What are the key features to consider when choosing a personalized canopy tent?
When choosing a personalized canopy tent, several key features should be considered to ensure that it meets your specific needs and preferences. Here are some important factors to take into account:
1.Size:
Determine the size of the canopy tent based on your intended use and available space.
Consider the number of people or items you need to shelter beneath the canopy.
2.Material:
Check the material used for the canopy fabric, frame, and any sidewalls. Common materials include polyester, polyethylene, and metal/aluminum frames.
Ensure that the materials are durable, weather-resistant, and suitable for your intended use.
3.Customization Options:
Look for a canopy tent that offers customization options, such as the ability to add your logo, graphics, or specific colors.
Verify the printing techniques available for personalization.
4.Frame Type:
Choose between different frame types, such as pop-up, collapsible, or traditional pole-style frames.
Consider the ease of setup and the sturdiness of the frame.
5.Portability:
Evaluate the overall weight and size of the canopy when packed for transportation.
Check if the tent comes with a carry bag or case for easy portability.
6.Ease of Assembly:
Look for a canopy tent that is easy to set up and dismantle, preferably without the need for specialized tools.
Consider user-friendly features like a push-button or snap-lock system.
7.Weather Resistance:
Assess the canopy’s resistance to various weather conditions, including wind, rain, and UV rays.
Consider additional features like water-resistant coatings and UV protection.
8.Stability and Durability:
Examine the overall build quality and durability of the frame and canopy.
Check for features like reinforced corners, sturdy joints, and robust connectors.
9.Accessories:
Explore available accessories such as sidewalls, weight bags, stakes, or anchors for added stability.
Consider compatibility with accessories like lights, heaters, or signage.
10.Cost and Value:
Compare prices among different canopy tent options while considering the overall value, including features, durability, and warranty.
Evaluate the long-term cost-effectiveness of the canopy in relation to its quality.
By carefully considering these features, you can choose a personalized canopy tent that aligns with your specific requirements and provides a durable and effective solution for your needs.
Can personalized garden flags be customized with specific camping quotes or messages, and how do I choose the right font and size for readability?
Personalized garden flags camping can certainly be customized with specific camping quotes or messages. Choosing the right font and size for readability is essential to ensure that the message is clear and easily understood. Here are some tips on selecting the right font and size:
1.Font Style:
Opt for clean and easily readable fonts. Avoid overly decorative or intricate styles that may be difficult to decipher from a distance.
Sans-serif fonts like Arial or Helvetica are often a good choice for outdoor flags as they are clean and easy to read.
2.Font Color:
Choose a font color that contrasts well with the background color of the flag to enhance readability. High-contrast combinations, such as black on white or white on dark green, work well.
3.Font Size:
Consider the viewing distance. If the flag will be viewed from a distance, choose a larger font size. If it’s primarily for close-up viewing, a slightly smaller size may be acceptable.
As a general guideline, a font size of 2 to 3 inches for shorter messages and 3 to 5 inches for longer messages is usually readable from a moderate distance.
4.Spacing:
Ensure adequate spacing between letters and words to prevent the text from looking crowded. Proper spacing contributes to better readability.
5.Test Before Finalizing:
Create a mock-up or preview of the personalized garden flag with the chosen font and size to see how it looks before finalizing your order. This can help you make adjustments if necessary.
6.Consider the Flag’s Design:
Take into account the overall design of the flag. Make sure the font style complements the theme and graphics on the flag, creating a cohesive and visually appealing look.
7.Weather Resistance:
Choose fonts and colors that are resistant to fading and can withstand exposure to outdoor elements. UV-resistant inks and materials are recommended for long-lasting readability.
Remember that personal preference also plays a role, so choose a font and size that align with your aesthetic preferences while prioritizing readability, especially in an outdoor setting where visibility can be challenging.
Can I include custom logos or graphics on my personalized EZ Up tent, and what file formats are recommended for the best print quality?
You can typically include custom logos or graphics on your personalized EZ Up tent. To achieve the best print quality, it’s important to provide the graphics in suitable file formats. Here are some recommendations:
1.Vector Formats:
EPS (Encapsulated PostScript): This format is commonly used for vector graphics and is ideal for logos or illustrations. It allows for scalability without loss of quality.
AI (Adobe Illustrator): Another vector format, often used for logos and graphics. It’s editable in programs like Adobe Illustrator.
PDF (Portable Document Format): PDFs can store vector graphics and are widely accepted for printing. Ensure that the PDF contains vector elements for optimal quality.
2.Raster Formats:
High-Resolution JPEG or JPG: For images or photographs, use high-resolution JPEGs with minimal compression to preserve image quality. Ensure the resolution is suitable for large-scale printing.
TIFF (Tagged Image File Format): TIFF files support high-quality raster graphics and are lossless, maintaining image integrity.
PNG (Portable Network Graphics): While generally used for web graphics, PNG files with high resolutions and transparent backgrounds can be suitable for certain applications.
3.Resolution:
For raster graphics (JPEG, TIFF, PNG), ensure a minimum resolution of 300 dots per inch (DPI) at the actual size of the intended print. Higher resolutions are often recommended for large-format prints.
4.Color Mode:
Use the CMYK color mode for printing, as it represents the four ink colors (Cyan, Magenta, Yellow, Black) used in the printing process. This ensures accurate color reproduction.
5.Background:
If your graphic has a specific background color or needs to be transparent, make sure to save it with the appropriate background settings.
Before submitting your files for printing, it’s advisable to consult with the printing service or vendor responsible for personalizing your EZ Up tent. They may have specific requirements or recommendations tailored to their printing processes. Providing high-quality, properly formatted files will help ensure the best possible results for your personalized EZ Up tent.
How can I design a personalized canopy cover to showcase my brand or personal style at outdoor events?
Designing a personalized canopy cover to showcase your brand or personal style at outdoor events involves considering various factors to create an eye-catching and effective display. Here are some steps and tips to guide you through the design process:
1.Understand Your Brand/Style:
Identify the key elements of your brand or personal style. Consider colors, fonts, logos, and any specific visual elements that represent your identity.
2.Define Objectives:
Clarify the goals of your canopy design. Are you aiming for brand recognition, conveying a specific message, or creating a visually appealing display?
3.Choose Colors Wisely:
Select colors that align with your brand or personal style. Consider the psychology of colors and how they evoke emotions or associations. Ensure good contrast for readability.
4.Incorporate Logos and Graphics:
Include your logo prominently. Ensure that logos and graphics are high-resolution and formatted for large prints. Vector formats are preferable for scalability without loss of quality.
5.Consider Readability:
Ensure that text is easily readable from a distance. Choose clear, bold fonts and consider the size and placement of text elements. Avoid overcrowding the design.
6.Highlight Key Information:
If your canopy is used for business, make sure to highlight key information such as your company name, tagline, contact details, and any important messages or promotions.
7.Utilize Imagery:
Include relevant and high-quality images that resonate with your brand or style. This could be product images, lifestyle photos, or other visuals that convey your message.
8.Create a Focal Point:
Design a focal point that draws attention. This could be a central logo, a bold headline, or a captivating image. A well-designed focal point can make your canopy stand out.
9.Maintain Consistency:
Ensure consistency in design elements across the canopy. Consistency helps in creating a cohesive and professional look.
10.Preview and Iterate:
Before finalizing the design, create a mock-up or digital preview to visualize how the canopy will appear. Seek feedback from others, and be willing to make adjustments for optimal impact.
11.Comply with Regulations:
If you’re using the canopy for commercial purposes at events, check for any regulations or guidelines related to branding and signage. Ensure your design complies with these rules.
12.Collaborate with Professionals:
If you’re unsure about the design process, consider working with graphic designers or printing professionals who specialize in canopy covers. They can provide valuable insights and ensure a high-quality end product.
By carefully considering these steps, you can design a personalized canopy cover that effectively showcases your brand or personal style at outdoor events, leaving a lasting impression on your audience.
How do I care for and clean my personalized 10×10 tent canopy to maintain the quality of the printed design over time?
Caring for and cleaning your personalized 10×10 tent canopy is essential to maintain the quality of the printed design and extend the life of the canopy. Here are some general tips:
1.Read Manufacturer’s Guidelines:
Check the manufacturer’s guidelines and care instructions specific to your tent canopy. Different materials and printing methods may have unique requirements.
2.Regular Maintenance:
Perform regular visual inspections for any signs of dirt, stains, or damage. Promptly address any issues to prevent them from becoming more challenging to clean or causing further damage.
3.Remove Loose Debris:
Before cleaning, use a soft brush or broom to gently remove loose dirt, leaves, or other debris from the surface of the canopy.
4.Spot Cleaning:
For small stains or localized dirt, spot cleaning may be sufficient. Use a mild soap or detergent mixed with water and a soft brush or sponge. Rinse thoroughly with clean water.
5.Hand Washing:
If the entire canopy needs cleaning, set up the tent and hand wash it with a mild soap or tent cleaner. Avoid using harsh chemicals or abrasive cleaners that can damage the fabric or printing.
6.Avoid Machine Washing:
Most personalized tent canopies are not suitable for machine washing. The agitators and spin cycles in washing machines can cause damage to the fabric and compromise the integrity of the printed design.
7.Rinse Thoroughly:
After cleaning, ensure the canopy is thoroughly rinsed with clean water to remove any soap residue. Soap residue left on the fabric can attract dirt and may lead to discoloration.
8.Air Dry Completely:
Allow the canopy to air dry completely before storing it. Avoid folding or storing the canopy while it is still damp, as this can lead to mold and mildew growth.
9.Store Properly:
When not in use, store the tent canopy in a cool, dry place away from direct sunlight. Use a storage bag or case to protect it from dust and potential damage.
10.Avoid Harsh Weather:
While these canopies are designed for outdoor use, it’s advisable to take precautions during severe weather conditions such as heavy rain or strong winds. If possible, disassemble and store the canopy in adverse weather.
11.Professional Cleaning:
For stubborn stains or extensive cleaning needs, consider professional cleaning services that specialize in tent and fabric care.
Always refer to the specific care instructions provided by the manufacturer, as they will have the most accurate guidance for your particular tent canopy. Regular and proper care will help preserve the vibrant appearance of the personalized design and ensure the longevity of your 10×10 tent canopy.
How can I decorate a party tent to create a festive and inviting atmosphere for guests?
Decorating a party tent to create a festive and inviting atmosphere involves combining elements that enhance the overall ambiance. Here are some ideas to help you decorate your party tent:
1.Color Scheme:
Choose a vibrant and cohesive color scheme that aligns with the theme or mood of the event. Consider using complementary colors for a visually appealing look.
2.Ceiling Decorations:
Hang decorative elements from the ceiling, such as string lights, paper lanterns, or fabric draping. This not only adds visual interest but also creates a more intimate atmosphere.
3.Table Centerpieces:
Place eye-catching centerpieces on tables. These could be floral arrangements, candles, themed decor, or a combination of elements that match the overall style of the event.
4.Flooring and Rugs:
Enhance the comfort and style of the tent by adding flooring or rugs. This not only defines the space but also provides a cozy feel for guests.
5.Themed Decor:
If the event has a specific theme, incorporate themed decorations like banners, signs, or props. This helps tie everything together and creates a cohesive atmosphere.
6.Lighting:
Experiment with different lighting options. String lights, fairy lights, or LED strips can add a warm and magical glow to the tent. Consider using different levels of lighting for depth and texture.
7.Furniture Arrangement:
Arrange furniture in a way that encourages socializing and flow. Use comfortable seating options and consider creating cozy lounge areas with cushions and poufs.
8.Personalized Touches:
Add personalized touches like custom banners, signage, or monograms. This creates a unique and memorable experience for guests.
9.Outdoor Elements:
Bring in elements from the outdoors, such as potted plants, flowers, or branches. This adds a touch of nature and freshness to the tent.
10.Balloon Displays:
Create balloon displays or arches in coordinating colors. Balloons are versatile and can be arranged to suit various themes and styles.
11.Fabric Draping:
Use fabric draping to add elegance and sophistication. You can drape fabrics along the walls or ceiling for a luxurious look.
12.Entrance Decor:
Make a statement at the entrance of the tent with welcoming decor, such as a themed archway, a stylish entry rug, or floral arrangements.
13.Music and Audiovisuals:
Set up a sound system for background music or hire a DJ to keep the atmosphere lively. Consider incorporating screens for slideshows or visual displays.
14.Interactive Elements:
Include interactive elements like photo booths, games, or interactive displays to keep guests entertained.
Remember to consider the preferences of the event and the tastes of the guests while decorating the party tent. The key is to create a space that feels comfortable, inviting, and aligned with the overall theme or purpose of the celebration.
How does the process of inflating a party tent blow up differ from traditional tent setups, and what are the advantages of this inflatable design?
The process of inflating a party tent blow up differs significantly from traditional tent setups, and there are distinct advantages associated with inflatable designs. Here’s a breakdown:
1.Inflatable Party Tent Setup:
Inflation Mechanism:
Inflatable party tents use air pressure to take shape. They typically have air tubes or beams that are filled with air to create the structural framework.
Inflation Time:
Inflatable party tents can be set up relatively quickly compared to traditional tents. The inflation process often takes a fraction of the time it would take to assemble a conventional tent with poles and connectors.
Ease of Setup:
Inflatable tents are known for their user-friendly setup process. It usually involves attaching a pump to inflate the structure, and the tent takes shape as it fills with air.
No Need for Poles:
Unlike traditional tents that rely on a complex system of poles and connectors, inflatable tents don’t require a separate framework. The inflatable structure serves as both the frame and the outer cover.
One-Piece Design:
Inflatable tents often have a one-piece design, reducing the number of components and simplifying the setup process. This can be especially advantageous for users who prefer a hassle-free assembly.
2.Advantages of Inflatable Party Tents:
Speed and Efficiency:
The speed of setup and inflation is a significant advantage. Inflatable tents can be ready for use in a fraction of the time it takes to set up traditional tents, making them ideal for events with tight schedules.
User-Friendly:
Inflatable tents are generally more user-friendly, making them accessible to a wide range of users, including those without extensive tent assembly experience.
Portability:
Inflatable tents are often more portable and easier to transport. When deflated, they take up less space, making them convenient for events where ease of transport is crucial.
Versatility:
Inflatable tents come in various shapes and sizes, offering versatility in design. They can be customized to meet specific event themes or branding requirements.
No Trip Hazards:
With no need for poles and guy lines, inflatable tents reduce trip hazards within the tented area, enhancing safety for event attendees.
Modern Aesthetics:
Inflatable tents often have a modern and sleek appearance, adding a unique and contemporary aesthetic to events.
Weather Resistance:
Some inflatable tents are designed with weather-resistant materials and aerodynamic shapes, making them more resilient to wind and rain.
Branding Opportunities:
Inflatable tents offer excellent opportunities for branding and customization. Logos, graphics, and messages can be easily applied to the inflatable surface.
While inflatable party tents offer many advantages, it’s important to consider factors such as maintenance, repairability, and the availability of power sources for inflation when choosing between inflatable and traditional tent options.
What materials are commonly used in the construction of 10×20 party tents, and how do these materials contribute to durability and weather resistance?
The construction of 10×20 party tents typically involves a combination of materials chosen for their durability, weather resistance, and overall performance. Here are the commonly used materials and their contributions to the tent’s characteristics:
1.Frame Material:
Steel: Often used for the frame structure due to its strength and durability. Steel frames provide stability and can withstand various weather conditions.
2.Canopy Material:
Polyethylene (PE): A common material for the canopy due to its waterproof properties. PE canopies are often treated to resist UV rays, ensuring longevity and protection against the sun.
Polyester: Coated polyester fabrics are popular for their water-resistant and UV-resistant properties. They are lightweight and provide a good balance between durability and affordability.
Vinyl: Heavy-duty vinyl is employed for high-quality canopies, offering excellent water resistance and durability. Vinyl is also known for its resistance to tearing and UV rays.
3.Connectors and Joints:
Plastic or Nylon: These materials are commonly used for connectors and joints in the frame. They provide flexibility while maintaining durability and resistance to weathering.
4.Zippers and Fasteners:
Metal or Plastic Zippers: Zippers used in doors, windows, or sidewalls are often made of metal or durable plastic. They contribute to the tent’s overall functionality and weather resistance.
Hook and Loop (Velcro): Velcro straps are frequently used for attaching sidewalls and ensuring a secure closure. They are durable and easy to use.
5.Anchoring Materials:
Stakes or Pegs: These are usually made of steel or durable materials and are used to anchor the tent to the ground. Proper anchoring is crucial for stability, especially in windy conditions.
6.Sidewall Material:
Same as Canopy Material: The sidewalls are often made from the same materials as the canopy, providing consistency in terms of water resistance and durability.
7.Flooring (if included):
Polyethylene or PVC: If the tent includes flooring, it is often made of polyethylene or PVC. These materials are waterproof and easy to clean.
8.UV Coating:
UV-Resistant Coating: Many party tents are treated with UV-resistant coatings to protect against the harmful effects of prolonged sun exposure, preventing fading and deterioration.
9.Fire-Resistant Coating:
Fire-Resistant Treatment: Some party tents are treated with fire-resistant coatings to enhance safety during use.
10.Carry Bag or Case:
Polyester or Nylon: The material for the carry bag or case is often polyester or nylon, providing durability and protection during transportation and storage.
It’s important to note that the quality and thickness of these materials can vary among different tent models and manufacturers. When choosing a 10×20 party tent, consider the intended use, climate conditions, and the overall quality of materials to ensure durability and weather resistance.




 5×5 Pop Up Tent
 6.5×6.5 Pop Up Tent
 10×10 Canopy Tent
 10×15 Canopy Tent
 10×20 Canopy Tent
 Canopy Options
 Blank Canopy Top
 Canopy Top
 Canopy Walls
 Canopy Side Skirt
 Blank Canopy
 Blank Canopy Kit
 Inflatable Canopy Tents 10×10
 Inflatable Canopy Tents 13×13
 Inflatable Canopy Tents 16×16
 Inflatable Canopy Tents 20×20
 Inflatable Canopy Tents 23×23
 Inflatable Canopy Tents 26×26
 Inflatable Spider Tents
 Inflatable Dome Tents
 Inflatable Eclipse Tents
 Inflatable Party Tent
 Inflatable Furniture
 Inflatable Pillar
 Single Pole Star Tents
 Double Pole Star Tents
 15FT Inflatable Arches
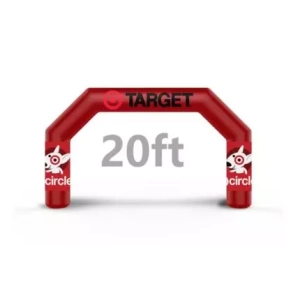
 20FT Inflatable Arches
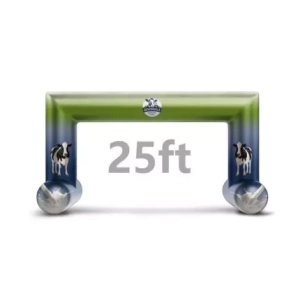
 25FT Inflatable Arches
 30FT Inflatable Arches
 40FT Inflatable Arches
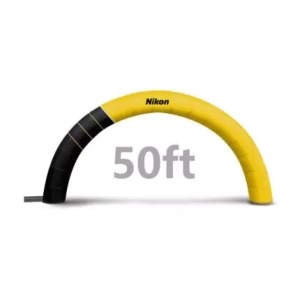
 50FT Inflatable Arches
 Custom Constant Arches
 Custom Sealed Arches
 Fitted Table Covers
 Stretch-Fit Table Covers
 Loose Table Throws
 Cross-Over Stretch-Fit Table Cover
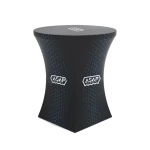 Round Stretch-Fit Table Cover
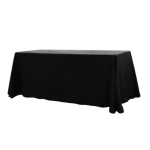 Blank Table Throws
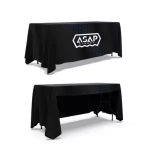 3-Sided Loose Table Throw
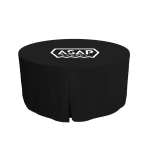 Round Fitted Table Covers
 Table Runners
 Square Table Covers
 Feather Flags
 Blade Flags
 Feather Banner
 Blade Banner
 Teardrop Flags
 Teardrop Banner
 Rectangle Flags
 Rectangle Banner
 Mesh Event Banners
 Pop Out Banner Horizontal
 Pop-Out Banner Vertical
 Trade Show Display
 Trade Show Display Kit
 Pop Up Trade Show Display
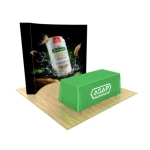 Pop Up Trade Show Display Deluxe Kit
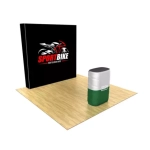 Pop Up Trade Show Display Kit
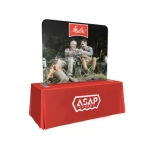 TableTop Displays Kit
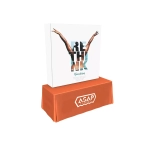 Pop Up Tabletop Display Kit
 Pop Up Tabletop Display
 Tabletop Display
 Straight Trade Show Exhibit Booth
 Banner Stand
 Tent Accessories
 Flag Accessories
 Arch Accessories
 Trade Show Accessories
