


Inflatable Canopy Display
1. What are inflatable canopys?
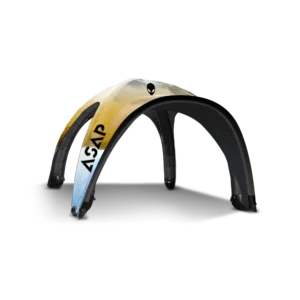
On the surface, inflatable canopys look very much like standard tents. However, there’s one key difference: rather than having metal or fibreglass poles, air tents have inflatable beams that are pumped up to support the shell of the canopy.
Once seen mainly at children’s birthday parties or as advertising props, inflatable canopys have undergone an innovative evolution in engineering. Modern inflatable camping shelters and event canopies now utilize cutting-edge materials and structural technologies that make them a versatile, durable alternative to traditional canopys.
Inflatable canopys employ carefully designed frameworks of pressurized tubes and support arches held taut by 360-degrees of enclosed air compression from lightweight but hardy fabrics. Air pressure flowing evenly through interlinking inflatable poles creates rigidity and tension between anchor connections across strategic spans. This forms a sturdy yet responsive self-supporting structure with space advantage.
High-tech heat-sealed plastic or ripstop cloth materials together with rugged zippers, straps, and floor seams make most quality inflatable canopys reliably waterproof and insulated too. By adjusting inflation levels, differing densities balance loft, stability and cushioned cushioning. Multiple chambers localize any pocanopyial leaks or tears as well.
In addition to camping in inhospitable terrain or during stormy weather, event coordinators value inflatable canopy versatility. Linking expansive arrays using tunnel sleeves allows custom event spaces perfect for exhibitions, product shows and temporary shelters to be merged. Hybrid builds pairing inflatable bases with truss roofs maximize usable volume which condensed when deflated.
Once perceived mainly as children’s amusement devices, cutting edge inflatable canopys now deliver robust and spacious shelter mobility perfect for unpredictable natural conditions and myriad staging needs alike.

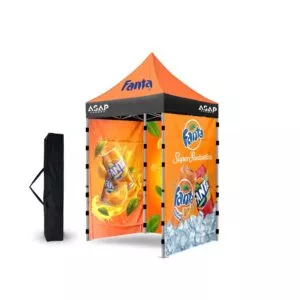
Custom Inflatable Air Tent With Full Color Printing 10×10

10x10ft Inflatable PopUp Canopy Tent

10x10ft Custom Canopy Tent Inflatable

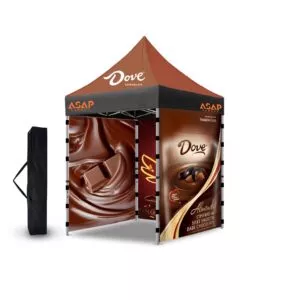
Custom 10×10 Inflatable Event Tents

10x10ft Custom Inflatable Tent
2. What are the advantages of Inflatable Canopys?
The main advantage of inflatable canopys is that they can be pitched and taken down much more quickly than canopys with poles. This is not only because the poles are inflatable, but also because they’re integrated into the body of the canopy itself.
Inflatable canopys derive key ease-of-use advantages over traditional pole and fabric designs by integrating their structural supports directly into air-held cavities. Rather than fussing to assemble an array of long, rigid poles requiting tedious insertion through fabric sleeves, inflatable models achieve frame shape the moment their valves open.
The user simply unfurls the canopy, secures anchor points if needed, and starts pumping air flow into the linked chamber beams and inflation points. An interconnected matrix of air pressure controlled by closure valves soon lifts the canopy into fully functional form without intensive manual shaping.
This inherent convenience does demand careful engineering into the customized chambers, durable seams, and airflow dynamics to maintain stability. There are costs accrued by specially fusing sturdy fabrics and integrating zone valves for adjustability not found on simpler canopys. However, the benefits manifest in easier transport, rapid deployment and secured inflation systems outpacing unreliable pole couplings.
While premium pricing applies for such innovative conveyance, the inflatable canopy canopy value proposition balances out through easier field use, adaptable dimensions via pressurization controls and built-in poles eliminating loss while maximizing internal space. One can quantify the savings from the reduced setup effort and strike down time when needing temporary events shelter that performs on demand.

Custom Inflatable Canopy Tents for Parties & Events

Inflatable Dome Tent Custom 10×10

10x10ft Inflatable Tent Ultra Portable
Custom 10×10 Inflatable tent with company logo

10x10ft Inflatable Tents For Sale
3. Are inflatable canopys strong and reliable?
Inflatable canopys might be filled with air, but they’re just as sturdy and reliable as standard tents. They can withstand strong winds and come with the usual guy ropes and pegs to keep them safely secured to the ground.
We’re not talking about some cheap novelty canopy here. Air canopys are created to an incredibly high standard and are no less reliable than their poled alternatives.
Regular canopys can withstand a fair bit of battering but they will get damaged if not cared for, and the same goes for inflatable canopys.
You may be wondering about pocanopyial punctures, and you can rest assured that they are incredibly rare. As with all canopys, just be mindful of any particular sharp objects and ensure you pitch the canopy on a level surface, clearing away rocks and any other nasties.
Punctures are rare and most inflatable canopys will come with a puncture repair kit to help you out in emergencies. You can also pick up replacement air tubes for some models if needed.
Custom 10×10 Inflatable Event Tent With Logo
Inflatable Dome Tent With logo Printing 10×10

Custom 10×10 Spider Inflatable Tent With Logo Printing

10x10ft Inflatable Tent For Events

10x10ft Custom Printed Inflatable Canopy
4. How do you pitch an inflatable tent?
Pitching an inflatable tent couldn’t be easier. Simply attach the pump and then it should only take a couple of minutes to inflate each air beam. Once the tent is fully inflated, double-check that all of the air valves are firmly closed and then secure your tent to the ground with the guy ropes and pegs.
9 Easy Steps To Pitching An Inflatable Tent
Ever wondered how to go about putting an inflatable tent up? Wonder no more – just follow our easy guide.
1. Read the instructions Some manufacturers have detailed instructions on their websites and even a video to guide you through the pitching process.
2. Lay the tent out flat. Unfold the tent, find the door, and place it where you want it. Lay it out flat and peg down the corners.
3. Find the valves. Different brands will have the valves in different places on the tent. Some have a single valve, others have one for each beam.
4 Attach the pump. Depending on your model, the fitting will either screw in, click in or push into the valve.
5. Start inflating. Make sure you don’t pump too much air into the beam – ideally use a pump with a pressure gauge and don’t exceed the manufacturer’s recommended pressure level.
6. Push the beams into shape. If it’s a bit breezy you might need a helping hand here – especially if you’ve got a large or heavy tent.
7. Peg out. You might after all that pumping! Of course we really mean you need to peg out the groundsheet and the side walls, checking for creases as you go along. Insert any poles for canopies etc
8. Peg out the guylines. Unravel the guyropes and peg them loosely round the tent before tightening them up.
9. Relax! Fifteen minutes later and you’ve done it. Well done!
One thing to bear in mind is that you’ll probably need to use the pump that was provided along with your tent, as different manufacturers use different valve systems. So, if you’ve got more than one inflatable tent, just make sure you’ve got the correct pump to hand.

10x10ft Inflatable Structure Canopy

10x10ft Custom Branded Canopy Tents

10x10ft Inflatable Event Tents

10x10ft Inflatable tent custom-printed
10x10ft Inflatable Canopy With Logo Printing
5. How do inflatable canopy tents work?
Inflatable canopy tents have become increasingly popular, due to their ease and convenience of pitching. Each brand has a selection of them now, which all work slightly differently, but essentially there are now two types – Single Inflation or Multiple inflation. Single inflation tents, these can be inflated from one beam, where as multiple inflation points, need each beam inflating separately.
By design all work from the same system and rely on a pressurised air system to create a strong, rigid structure. A bit like a bicycle tyre, each tube holds an air pressure of anything from 4PSI to 8PSI, and creates a very strong, reliable frame for the tent.
Tube and Sleeve Design:
All tents feature this design, the tubes are pre-tested in the factory to check them for leaks, then they are deflated and inserted into a highly robust tube sleeve, this is to stop the tube over-expanding. Then, the tube and sleeve are inserted into flysheet panels within the tent. Confused? See below, which helps describe how the design works.
There is a plastic tube, which can be inflated to a certain pressure.
The plastic tube is inserted into a solid polyester sleeve.
The tube and sleeve are then housed in a tent sleeve inside the tent, and once inflated provide the tent’s structure.
There is a small hole in the flysheet at each beam, where the valves sits, so the tent can be inflated or deflated from the exterior.
The Air Valve
There is a simple valve to one side of the tent, which you open and insert the pump into, and then inflate the beam, which then creates the tent’s structure. It is incredibly simple and well thought out, and far easier than the hassle of poles. Each brand has its own unique pump valve, which should come with the tent. There are typically two valve systems:
Airbeam – Twist Valve
This is ASAP’s design – a twist valve, which is locked closed, and then you twist the pump onto the valve, which opens the valve, and allows you to inflate the tent. Once you remove the pump, the valve seals itself locked.
When it comes to deflating the tent, there is a white point on the valve, you twist this to the open setting, and it allows air to escape the valve.
Push Button Valve
There is white button on the valve – you firstly push this button in, and then this closes the valve. Then you insert and twist the pump onto the valve, which will open the valve and allow air into the beam. When you remove the pump, the valve will close itself. It is important to close the valve before inflating the tent, or when you remove the pump, all the air will escape out of the open valve. To close the valve, make sure it is pushed outwards.
When deflating the tent, simply push the button to open, and the air can flow out of the tent.
Type of Inflation
Single Inflation Point:
A single inflation point tent, is a tent which can be inflated from one beam, which is interconnecting to all of the other beams inside the tent. Usually all beams are linked, and can be inflated from any main tube. This allows multiple people to help, and for the tent o be pitched far quicker.
Advantages:
Tent inflates from one point, so you can plug a pump in and sit back and relax.
Features bracer beams, which strengthen the tent structure.
Can be quicker to inflate.
Disadvantages:
This style of tent is more prone to issues – as there’s more points of connection between beams, meaning more chance of a fault. Though the product is tested, we would still see more single-inflation tent issues than multiple inflation point issues.
Harder to repair or find where the air is coming from – you have to lock off each individual beam, to check where the leak is, and then fix that specific tube.
Harder to deflate and pack away – this is because as you are packing the tent away, the air can move from tube to tube, leaving air in the frame system.
Multiple Inflation Points:
Advantages:
Less likely to fail as one simple beam per structure.
Easier to repair if a singular tube goes wrong – simply remove this tube and replace it.
Mini break between inflating each beam.
Much easier to deflate and pack away
Disadvantages
Less likely to have bracer beams
Much more reliant on the camper to pitch it, as you cannot simply plug a pump in and let that do the hard work.
Are they Reliable?
Yes, as we see more accidental damages to pole tents, which are more reliant on the camper to pitch them. Air tents have the structure pre-installed, so there’s very little a camper can do to damage it. Also they tend to perform better in the wind as the beams will simply just snap back into shape if deformed by strong winds. Most are are tested to 45-55mph. Anything stronger than this type of weather, and ideally it is not recommended to camp.
If you are uncertain, or feel worried, it is advisable to purchase a spare air tube, which is the same as having a spare tyre in your car or bike, and then you have the peace of mind if anything does go wrong.

Inflatable Hot Tents 10x10ft

10x10ft Custom Color Inflatable Canopy

10x10ft Fast setup Inflatable Canopy

Custom Inflatable Outdoor Tent 10x10ft

Outdoor Inflatable Tents 10x10ft
6. Inflatable Canopy Vs Traditional Pole Tents: Which Is Best For You?
Trying to figure out which tent is best for your needs? Let’s against to find out if air tents or pole tents come out on top! Selecting the right tent is a crucial decision. Two popular choices are air tents and pole tents, each offering unique advantages and considerations. From setup time to price and durability, we’ll explore the characteristics of both tent types to help you make an informed choice for your next outdoor escapade!
Pole Tents:
Pole tents, also known as frame tents, rely on rigid poles made of materials like aluminium, steel, or fiberglass to create a structural framework supporting the tent fabric.
Advantages:
Smaller Packsize: Pole tents are space-efficient, making them easier to store and transport.
Cost-Effective: They are generally more budget-friendly than air tents.
Spaciousness: Pole tents offer more headroom and interior space, thanks to their taller centre poles.
Disadvantages:
Setup Time: Setting up pole tents can take longer due to multiple poles and fabric attachment.
Difficulty: They might be challenging to set up alone, making them less ideal for solo campers.


10×15 Custom Printed Canopy Tent


Custom Canopy Tent 10×10 Online

Custom Logo Canopy Tent 10×10


Heavy Duty Canopy Tent 10×10 with Full Color Print
Inflatable Canopy Tents:
Air tents, also known as inflatable tents, use air-filled beams instead of traditional poles for support. These tents have inflatable tubes made of durable materials, inflated using a pump.
Advantages:
Quick and Easy Setup: Air tents can be pitched and taken down faster than pole tents, thanks to the inflatable beams.
Robust and Stable: They offer excellent stability and resistance to weather conditions, as they lack traditional poles.
Disadvantages:
Weight: Air tents can be heavier due to robust materials, which might impact portability.
Price: They are often more expensive than pole tents, so budget-conscious campers might prefer pole tents.
Choosing the Right Canopy Tent for You:
Ultimately, the decision depends on your preferences and needs. Consider the following factors:
Cost and Frequency: If you camp frequently or embark on extended trips, the ease and efficiency of an air tent might outweigh the higher cost. Occasional campers or budget-conscious individuals may find pole tents more suitable.
Portability vs. Durability: Evaluate whether lightweight portability or robust durability is a priority for your camping adventures. If you’re constantly on the move, a small pole tent might be the better option.
Setup Time and Familiarity: Air tents offer quick setup with a pump, while pole tents cater to traditional campers who prefer familiar setups.
Remember, whichever tent type you choose, opting for a high-quality tent from a reputable retailer ensures great durability and an enjoyable experience!

Inflatable Canopy For Events 10x10ft

Automatic Inflatable Tent 10x10ft

Air Inflatable Canopies 10x10ft

10x10ft Commercial Canopy Tent

Outdoor Inflatable Tents House 10x10ft
7. How To Pack Away An Inflatable Canopy Tent?
Inflatable tents are easy to use and easy to set up. Getting them back into storage is another thing. Check out our breakdown.
Just 6 steps to quickly recycle your inflatable tent:
1. OPEN UP ALL THE DOORS
It seems like everyone would do this straight away, but it’s often overlooked in the rush to get home. Unzip every door you have so the air has a way to escape.
2. OPEN THE VALVES AND WAIT
All inflatable tents come with air valves, some bigger than others. Open these air valves up and wait for your tent to deflate.
Walk On The Air Tubes
Take off your shoes and walk along the air tubes toward the valve. This gets the air out of the tubes. Know that this could invalidate your warranty, so do this with caution (or not at all).
3. FOLD BOTH SIDES OF THE TENT TO THE MIDDLE
Take the back and front of the tent and fold them in toward the middle, so the edges touch. Fold those created ends of the tent inward again until you have a folded tent the same size (or less) than your tent bag. We place the bag next to the folded tent to ensure we have the right size. Make sure you take time with this step, as it will make a huge difference in the end.
4. ROLL THE TENT
If you have any tent poles, put them at the opposite end of the air valves. Use them to start rolling up the tent, focusing on keeping the tent rolled as tight as possible. Squeeze the air out as you go. We often use our knees for that process. Continue rolling and squeezing until you reach the air valves. If you can’t get it inside your bag, re-roll the tent. It’s typical that there’s too much air left in the tent the first time.
5. TIE UP THE TENT
We hope you kept the straps or ribbon that were tied around your tent when you first opened it. You’ll want to use those now so it doesn’t become unrolled in the packing process.
6. PUT IT BACK IN ITS BAG
After all your hard work, you should have a tent that will fit into its bag. However, if it doesn’t, don’t feel too bad. It doesn’t always work that way for us either–just start again, remaining calm.
PITCHING IN MINUTES
Check out ASAP CANOPY’s wide range of inflatable tents and browse our extensive range featuring our very own in-house brands for guaranteed quality. Browse through different styles, designs, sizes and more to find the perfect fit for you.

10x10ft Inflatable Tent For Beach Use

10x10ft Inflatable Tent For Event Use

10x10ft Inflatable Tent Custom

10x10ft Inflatable Pop Up Tent

10x10ft Inflatable Tent With Furniture Kit
8. The Benefits of Inflatable Air Tents?
When choosing the right tent for Event, backpacking or any outdoor experience, it’s important to consider the number of people joining you, as well as the type of terrain you’ll be setting up on. You’ll want to be comfortable, safe, and dry when Event, and of course, pitch your tent quickly to start enjoying your holiday as soon as possible.
Here at APAP CANOPY, we can offer our expertise on the best inflatable air tents to suit your Event needs.
Inflatable air tents are Event extremely popular and are in high demand thanks to the many benefits they can offer to every type of Event. ASAP CANOPY supplies inflatable air tents in several sizes and designs, from a wide variety of brands, so you have ample choice in finding the right air tent for your next Event adventure.
But what are the benefits of inflatable air tents, and how do they compare to traditional tents for the best Event experience possible?
Easy and quick setup
Event is a time to relax, take a well-earned break from everyday life, and enjoy the great British countryside – or one of the UK’s beautiful beaches. What most people don’t enjoy, however, is setting up camp and getting everything just the way you want it. Unlike traditional pole tents, inflatable air tents can be set up in just a few minutes with the help of an air pump. This makes them ideal for Event trips where you want to set up camp quickly and easily, such as for parents with young children, or if it’s starting to get dark. It also makes setting up in the rain less of a pain too!
Lightweight and portable
Event equipment that is lightweight and portable is a must when traveling in the great outdoors. You’ll often be going on long walks, carrying various pieces of gear, and lightweight tents are especially essential for backpackers who traverse great distances to different locations. That is why inflatable air tents are beneficial for those looking for an easy-to-carry, lightweight tent that can be taken anywhere. From small, one-person air tents to larger sizes able to accommodate groups of five or more, inflatable tents can be carried in your Event rucksack or stored compactly in your car for whatever length of journey.
Durable and strong
Even though you may think of inflatable materials as easily puncturable from sharp objects or uneven ground, ASAP CANOPY’s selection of inflatable air Event tents from leading brands are all made from the strongest material available. These materials are made to withstand the elements including strong winds, rain, and the sun, whilst also being extremely tear-proof, meaning you can set up your inflatable air tent on any terrain. In addition, compared to traditional pole tents, air tents are much less likely to break and bend, giving you peace of mind that they will have a long-lasting life.
Spacious and comfortable
Inflatable air tents come in a variety of shapes and sizes, allowing you to choose the perfect tent for your needs. They also tend to have more headroom and living space than traditional tents, making them more comfortable for extended Event. This is why inflatable air tents are more beneficial for large families and groups who are looking for a large space to relax in after a busy day of outdoor activities. You’ll have ample room for your family, as well as extra space for your camping gear, with the range of air tents from Outdoor Event Tent that can accommodate up to 2-12 people, in addition to awning extensions to help you make your campsite a home away from home.
Event tents are suitable for any occasion
One of the great things about air tents is that they are extremely versatile and can be used in a wide selection of settings. As well as Event, you can pitch your air tent at festivals, beach trips, on hiking adventures, and more. Here at ASAP CANOPY, we supply a vast range of inflatable air tents from high-end and reputable manufacturers, and we are confident we have an air tent to suit your camping needs, no matter the environment or the number of campers.
Come take a look at our selection of Event air tents and an array of other Event gear and accessories, or get in touch with one of our team for any questions.

Custom Printed Trade Show Inflatable Tents 10×10
10×10 Inflatable Tents With Logo Print For Sale

10x10ft Unique Inflatable Tents
Custom Inflatable Air Tent 10×10 With Logo

10x10ft Custom Inflatable Tents
9. Inflatable Tent Performance Analysis: Pros and Cons Unveiled?
In recent years, inflatable tents have gained popularity among outdoor enthusiasts due to their convenience and ease of setup. These tents use air beams instead of traditional poles, making them lightweight and compact. In this article, we will analyze the performance of inflatable tents, unveiling their pros and cons to help you make an informed decision for your next outdoor adventure.
Inflatable Canopies, Inflatable Tents for Parties & Blow Up Tents
The Pros of Inflatable Tents
Inflatable tents offer several advantages that make them appealing to Event and backpackers. Firstly, their quick and effortless setup is a major plus. With an inflatable pump, you can have your tent up and ready within minutes, allowing you to spend more time enjoying nature. Additionally, these tents are highly portable and lightweight, making them ideal for backpacking trips. Their compact size when deflated saves valuable space in your backpack, leaving room for other essential gear.
Enhanced Stability and Durability
Contrary to common misconceptions, inflatable tents provide excellent stability. The air beams used in these tents are designed to withstand strong winds and adverse weather conditions. They offer a solid structure that can handle the pressures of the outdoors. Additionally, the use of durable materials ensures that these tents can withstand wear and tear, providing you with a reliable shelter for multiple Event.
Comfort and Interior Space
Inflatable tents often offer generous interior space, allowing Event to move around comfortably. The absence of traditional poles eliminates the need for a central support column, creating more usable space within the tent. Furthermore, many inflatable tents come with multiple rooms or partitions, providing privacy and separate sleeping areas for larger groups or families.
The Cons of Inflatable Tents
While inflatable tents have numerous advantages, it’s essential to consider their drawbacks as well. One potential downside is the risk of punctures or leaks. Although modern inflatable tents are made with durable materials, accidents can happen, and a puncture could deflate the entire structure. However, most inflatable tents come with repair kits to address such issues quickly.
Price and Availability
Compared to traditional tents, inflatable tents often come with a higher price tag. The advanced technology and materials used in their construction contribute to the increased cost. Additionally, the availability of inflatable tents might be limited Event to traditional tents, as they are still gaining popularity in the market. However, the investment in an inflatable tent can be worthwhile for those seeking convenience and ease of use.
Conclusion:
Inflatable tents offer a range of benefits for outdoor Event, including quick setup, enhanced stability, and spacious interiors. While they may have a higher price point and a slight risk of punctures, the advantages outweigh the drawbacks for many Event. Consider your specific needs and preferences when choosing a tent for your next adventure.

10x10ft Custom Inflatable Tents For Party

Custom 10x10ft Inflating Tent

10ft Custom Printed Inflatable Tent

10x10ft Inflatable Tent For Sale

10x10ft Inflatable Tents With Electric Pump
10. Why are inflatable canopy tent so expensive?
We’ve all had problems with inflatables, but the reason inflatable tents are a little more expensive than your standard tent, is that they are made from a much stronger material. Think of it as buying a much more & personalized canopy tent, you’d probably expect it to cost a little more than your standard tent.
Inflatable tents and canopies command premium shelf prices exceeding traditional pole and fabric tent counterparts owing to the proprietary material and engineering investments necessary to enable their convenience benefits. Creating an array of airbeam supports structurally sound enough to endure wind, weather and occupant activities requires cutting-edge pole substances and heat-welded seam precision across the enclosed volumes.
The base fabrics themselves must fuse durable polymer layers and threading reinforcements able to contain high air pressures while permitting adjustability. These specialized textiles and injection-molded components cost more upfront over basic aluminum rods and canvas sheets before considering the expenses of performance testing and refining the internal shape architectures.
Moreover, the process of bonding customized air chambers into reliable zone valves and gauges to control inflatable body stiffness adds production steps unmatched by basic tents. Owners also expect secondary backup and redundancy features given dependency on the integral air beams always retaining pressure. Net yields shrink further through low manufacturing volumes today.
Yet inflatable tents liberate such a huge advantage in deployment time, adjustable volumes and integral frame integration that early adopters readily justify the premium. As production scales increase in coming years, prices should modulate closer to standard tent market rates while maintaining performance advantages. But for now, the custom materials and complexity inflatables necessitate keep their pricing at a higher tier temporarily.


13x13ft Inflatable Tents For Sale

13x13ft Inflatable Tent for Fast & Easy

13x13ft Inflatable Pop Up Canopy Tents

Inflatable Spider Tent 13x13ft

13x13ft Inflatable Tent For Events
11. Do inflatable tents puncture?
The same goes for your inflatable tent. While traditional tent poles are prone to breaking, air tubes aren’t exempt from going faulty, either. Although air tubes should last for years to come thanks to their tough construction, damage or punctures can happen.
That’s why you need to have spares on hand, just in case something goes wrong. From patching tape to spare tubes, you should never leave home without them. So, what should you do if you spot a puncture or damage?
If you’re an experienced camper, you’ll know that your kit and gear can be damaged – so it’s best to have spares.
Why should I buy a spare air tube for my tent?
There is only one answer for this because you never know when you may suffer a puncture or damage to your tent’s air beam.
Air tents are created to an incredibly high standard and are no less reliable than their poled alternatives. Just like regular tents, inflatable tents can withstand a fair bit of battering but will get damaged if not cared for properly.
Punctures are incredibly rare in air tents. You just need to be mindful of any particular sharp objects when you’re pitching the tent. Ensure you’re on a level surface, clearing away rocks and any other objects.
Should your tent suffer a puncture, you can repair it on-site with a kit or buy a replacement tube to fit yourself.
A good question to ask is ‘Would you go on a bike ride, without a spare inner tube?’. The difference here though is that while the tube would be replaced under warranty but at least you will always have a spare tube at all times.
How to repair a tent air tube
If you have to repair an air tube on your inflatable tent, you can temporarily repair it, however, this is only a temporary solution – ideally, the tube needs to be replaced when you return from your camping trip.
Firstly, you need to deflate the tube – wait until the air is completely gone – and then remove it from the protective sleeve.
You should never open or remove the air tube unless you are positive that it is leaking and needs repair.
Remove the internal bladder from the sleeve/casing. Your air tube is made of two parts, the internal bladder, the plastic tube you inflate, and a case that can be zipped closed. The case gives shape to the air tube and protects the bladder.
You can check your valve that it’s ok, and if it is, you can keep using it. Once that’s done, you can remove the air bladder from the case.
Then, find your puncture or leak in the plastic bladder tubing.
Stretch out and flatten the tube as much as you can on a flat surface and apply – in this and most cases – tape. You can find repair tape by McNett, Regatta, Highlander, and Summit, but duct tape will also work well as a last resort.
Make sure the tape is firmly stuck on the plastic bladder with no air pockets in the tape.
You’ve now repaired your air tube and it’s ready to go back in the casing for use in your air tent.
How to replace an air tube
If you’ve tried repairing your air tube with tape and have found it hasn’t worked or the damage is too much, you’ll need to replace it.
Like above, deflate the air tube that you want to replace and unzip it from the inside of the tent flysheet. Once it’s deflated, remove the plastic internal bladder from the outer sleeve/case.
Roll out the new internal bladder flat on the ground parallel to the outer sleeve/casing. Then, insert it into the sleeve making sure you don’t twist it. Fix the bladder in place by attaching the valve into the socket through the casing and into the internal bladder.
If you twist the internal lining, it could result in a blockage or misshapen beam.
If you get to the other end of the tube and have excess inner lining remaining, carefully fold or roll it over to fit the length of the casing. Do this instead of bundling everything into the casing/sleeve. You can tape it in place if you need to.
It’s quite common for inflatable tents to have different sized beams, so, always have the longer tube as your spare. You can easily shorten this to fit the area of a where a shorter one would normally go.
Zip the casing/sleeve closed, making sure you don’t snag the new internal bladder on it.
Then, insert the air tube back into the tent sleeve or flysheet. You can lightly inflate the tube so you have a helpful shape to make installing it easier.
Insert the tube and line the valve up correctly. Then, you can close the tent sleeve around the air tube and inflate it fully.
On-site Repair Tips
Do not inflate an air tube until it is protected by its sleeve – and never undo the sleeve when an air tube is inflated.
Once the repaired air tube is in its sleeve, slowly inflate it.
Regularly check the air pressure so you put as little stress on the repair as possible.
Repairs are temporary, so contact your retailer as soon as possible for a replacement tube.
Tape will often cover all repairs – to the tent, air tube or valves.

13x13ft Custom Printed Inflatable Canopy

13x13ft Inflatable Structure Canopy

13x13ft Custom Branded Inflatable Tent

13x13ft Air Inflatable Dome Tent

13x13ft Air Inflatable Tent Custom-Printed
12. Do air tents deflate?
All inflatable tents come with air valves, some bigger than others. Open these air valves up and wait for your tent to deflate.
A key advantage of inflatable tents is the ability to actively control air pressure levels within the integrated support beams and chambers. While maintaining full inflation is vital for structure during use, all quality models incorporate valve flaps allowing intentional deflation as well. By opening the major valves after initial deployment, owners can initiate a controlled tent lowering.
Deflation capabilities make storage and transport ability straightforward- the tents pack down into a compact form factor once air escapes the internal network of air poles and stabilizer bands. Carefully pinching and shutting the major valve openings once empty of air allows the tent to remain in sealed standby mode, ready for quick reinflation cycles.
With practice, campers and event teams learn swift inflation/deflation sequences to set up and break down within minutes. Just take care when opening valves of large inflatable event tents- the rapid air escape can nearly resemble a balloon rocket! But gradual pressure release remains an essential returning inflatables to portable mobility. So ensure your next inflatable model tent, however spacious, has oversized valves for timely deflation maneuvers.

13x13ft Inflatable Event Canopy Custom

13x13ft Inflatable Tent With Optional Walls

13×13 Inflatable Tent With Full Color Printed

13x13ft Fast Setup Inflatable Canopy Tent

Inflatable Tents For Events With Full Color Print 13×13
13. Are inflatable tents lighter?
The size the bigger – the thickness of the yarns of the fabric – the heavier the tent, however, as there are no pole in an inflatable tent, the vast majority are lighter to carry than pop up tents.
When evaluating overall weight between inflatable canopy tents, inflatable tents shine as lighter alternatives by integrating necessary structural support directly into pressurized chambers rather than external poles and bars. Despite their expansive dimensions, the self-contained inflatable beams compose of lightweight polymer fabrics drop total heft below typical aluminum & fiberglass poles and connecting hardware that accumulate mass.
Of course, fabric thickness, density parameters, and any secondary reinforcing layers add incremental weight inflatable models as maximum size increases. Giant event tents require fortified layers and surge valves boosting materials applied. But the base architecture lacking an external frame cuts basic weight while maximizing usable interior volume since walls curve directly to boundaries.
Moreover, the weight gets evenly distributed between embedded air enclosures rather than concentrated on joints of metal pole sets. This better supports manageable rolling and transport after deflation. Durability, weatherproofing, overall capacity does scale additional ounces as expected. Still, equivalent capacity pole tents necessitate thick, heavy frames themselves alongside fabric coverings.
So when seeking shelter to service groups while remaining portable, inflatable tents achieve desired headroom and occupancy factors at lighter weights than traditional predecessors. Just be sure your inflation pump has muscle to meet size needs!

13x13ft Full-Color Inflatable Tent

13x13ft Graphics Customizable Tent
13x13ft Inflatable Canopy Print With Logo

13x13ft Inflatable Canopy Tents

13x13ft Commercial Inflatable Tents
14. Can I Overdo It And Explode An Inflatable Tent?
It is often asked whether an inflatable tent can explode, pop or puncture. The ASAP® User Guide provides information on the pressure to which an ASAP® tent should be inflated, depending on the model. As long as the guidelines are followed and the correct supplied pump is used, the ASAP® inflatable tent will not explode. Although rare, all inflatable tents can be punctured but it’s easily repairable and again, the User Guide provides information on how to do this correctly.
A common question around inflatable tents is whether excessive internal air pressure could risk rupture or explosion. However, quality models implement redundancies and guidelines preventing overinflation mishaps when used properly. Reliable providers engineer maximum fill levels and reference those targets directly on included inflation pumps to match tent capacity.
By following pressure limits printed on each enclosed air zone, achieving firm structural shape without compromising integrity is straightforward. Even if misused pumps overfill involuntarily, contemporary materials have surprising tensile strength. Any escaping bursts of overpressure prove minor, manifesting as small, easily patched seams rather than fabric detonations.
Certainly sharp objects may still externally puncture chamber walls as with any inflatable. But modern composites self-seal around most tears, retaining baseline utility even damaged pending professional patch jobs. While calm overinflation barely canopy tents, common sense still demands care when manipulating structural air beams under tension. Just take time familiarizing safe operation per enclosed guidelines so everyone enjoys stable shelter free of explosive anxiety!

13x13ft Inflatable Tent Use In Event

13x13ft Inflatable Tent For Beach Use

13x13ft Inflatable Tent For Event

13x13ft Inflatable Tent Custom

Inflatable Pop-Up Canopies 13x13ft
15. How good are inflatable tent in the bad weather?
ASAP® inflatable tents are extremely resilient to bad weather. Models with a central beam have a lot of structural support and can withstand some seriously bad weather conditions, although they may flex in very strong winds. This shouldn’t be seen a weakness, however. By flexing, the ASAP® inflatable tent takes the pressure, whereas if winds become too strong for a poled tent, the solid poles can bend and break, perhaps ripping fabric and causing damage. Some ranges of ASAP® inflatable tents have pre-angled beams rather than a continuous arc to create more useable internal space, with the added benefit of keeping the tent sturdy against strong side winds.
Inflatable tents leverage their air-beam and chamber construction to demonstrate impressive all-weather resilience compared to traditional poles and fabrics. The enclosure of entire support structures into polymeric air cells allows flexibility when confronting strong winds yet retains fundamental shape. Fierce gusts may ripple and distort temporarily inflated walls but framework reunifies afterward versus permanent bending.
The continuous air pressure circulation provides tensile “cushions” against shear forces throughout while preventing broken poles and view obstructions as solid barriers crack under duress. Models with segmented, pre-angled beams optimize usable internal space further by deflecting turbulent eddies offstream.
Central inflatable spines withstand focused wind, rain and hail barrage through further fabric reinforcements yet still breathe with circumstances. Perimeter linkage points distribute kinetic energies diffusively. Any stray punctures trigger backup density controls rather than structure failure.
So next time your preferred campsite suffers a squall line blowthrough or event venues see storms approach, have confidence in modern inflatable tents’ leading weather-ability. Their enclosed pneumatic skeletons flex yet rebound despite winds and precipitation that might snap traditional pole and tent fabrics. Inflatable structure dynamics handle inclement conditions by design!

Inflatable Tent With Furniture Kit 13x13ft

13x13ft Inflated Canopy Tent Provides

13x13ft Inflating Tent For Various Occasions

13x13ft Unique Inflatable Tents
Portable Inflatable Air Tent 13×13 with Logo Printing
16. How to repair a puncture in an inflatable tent?
The answer to this is simply – yes! The User Guide provides step by step information on how to check the pressure, identify and repair punctures, and replace the ASAP®. ASAP CANOPY provides a range of different sizes of replacement ASAP®.
One of the most appealing aspects of modern inflatable tents is the engineering for simplified maintenance expected from outdoor shelter assets. Since their structural integrity centers on integrated air cavities, upkeep involves basic air pressure management rather than intricate pole and fabric repair. Just attach and consult the right gauge kit upon setup.
Keeping internal PSI levels optimized requires only cursory visual scans looking for obvious seam punctures and listening for leaks around closures. Any tears likely self-seal initially, then patch easily with provided repair adhesives if necessary. Trouble-free bonded stitching eliminates erosion issues.
When lifespan passes demanding events use, full tent replacement restores out-of-box performance thanks to assembly free construction. Various capacity options exist so upgrading remains convenient. Compared to dismantling cumbersome pole components piecemeal when conventional tents show age, inflatable technology preserves simplicity from deployment through daily use all the way replacing down the road.
So upon investing in an inflatable shelter system, relax knowing that modern engineering safeguards and accessibility procedures make their patented pneumatic structures far easier to operate and sustain long term than traditional predecessors. Just focus activities enjoying the spacious covered space rather than maintenance!

Inflatable Outdoor Tent 13x13ft

13x13ft Custom Inflatable Tents

Custom 13x13ft Air Tent With Inflatable Table

13ft Custom Printed Inflatable Tent

13x13ft Inflatable Tent For Sale
17. Are inflatable tents good for winter?
The main thing is to choose a model made of waterproof materials. Therefore, inflatable tents will protect you from heavy rain, snow, and wind, whether it’s summer, spring, or winter outside.
Inflatable camping tents and shelters stand out as viable temporary dwelling options even when facing harsh winter winds, snow and frigid temperatures. Their ripstop polyester or PVC compositions selected for all-season reliability keep occupants shielded from ambient conditions once secured. Tight waterproofing seals prevent icy seepage while locking in warmth effectively.
Durable construction meant to endure summer ultraviolet rays and rains translates into winterized protection too. Many models advertise eco-friendly flame retardant treatments less prone to fire risk from interior heating necessary this time of year as well. Meanwhile, snow accumulation actually stabilizes erected tents through additional anchoring weight subtly lending counterbalance.
The absence of multiple rigid poles susceptible to cracking and warping when burdened by heavy frozen precipitation or iced-over in sub-zero nights proves another advantage over traditional tents. Air beams flex and rebound despite precipitation loading on their curved shells.
So rather than dreading the task of securing temporary event spaces this holiday season or outfitting that base camp to the ski resorts, trust modern inflatable canopy engineering to deliver literal flexible shelters ready for old man winter’s worst! Their all-weather reliability keeps activities rolling no matter what storms may blow through.

Inflatable Tent For Party 13×13 Custom

13x13ft Full Color Print Inflatable Tent

13×13 Inflatable Tent With Full Color Print

Inflatable Tents 13x13ft

13x13ft Custom Canopy Tent Inflatable
18. How To Clean A Tent? How storage you a tent after camping?
This guide reveals how to expertly clean a tent, so you can lift stains, remove mould, neutralise musty outdoor odours and get rid of any mud or debris that may have stuck to or fallen in your tent.
Unforgettable memories aren’t the only thing you can expect to bring back from your camping trip, as debris from the great outdoors is likely to join you on your return home too.
And when you invest in a high-quality tent, it makes sense to keep it fresh and clean so you can use it time and time again.
TOP TIPS FOR CLEANING YOUR TENT
Unfortunately, cleaning your tent isn’t always the easiest of tasks. In this section, we’ll explain the do’s and don’ts, simplify the tent cleaning process and reveal how to effectively wash your tent.
If you’re wondering how often you will need to clean your tent, the answer depends on how frequently you use it. It’s key that you wash your tent after any extended camping trip, especially if it has been raining, was muddy or your tent was exposed to nature’s elements.
Even if it hasn’t been a muddy affair and it was only a short trip, we would recommend giving your tent a simple clean. Or if it remains nearly untouched, a clean once per season will suffice.
THINGS TO AVOID WHEN CLEANING YOUR TENT
Although it may be tempting, there are some things you should never do when cleaning your tent, this includes putting your tent in a washing machine as it can cause the tent’s outer material or interior mesh to tear, and it could also cause your washing machine to break due to the weight of the wet tent.
If you don’t have a bathtub you can wash your tent in, in most instances you can hose down a tent with the help of a bucket, sponge and mild soap, but you have to take into consideration the pressure of the hose. A hose fixed on a high-power setting can cause rips and tears in your tent. Similarly, you should never use a pressure washer when cleaning your tent as it can also drag the seams of your tent and cause them to split.
STEP-BY-STEP TENT CLEANING PROCESS
The most effective and safest way to clean your tent is outlined in the steps below:
IF SOAKING IN A BATH/CONTAINER (PREFERRED) YOU WILL NEED:
– Outdoor gear cleaner, such as Nikwax Tent & Gear Cleaner
– Sponge/cloth
– Washing line/airer
STEPS FOR WASHING IN A TUB:
Prep: Open your tent fully, in a garage or your garden, unzipping all the interior rooms, doors, tent windows or other flaps and reverse the tent so it’s inside out.
Tidy: Ensure there is no remaining debris or litter inside your tent, use a dustpan and brush to clear any loose mud or crumbs.
Spot clean: If there are some stubborn stains on your tent, make sure to spot clean with a wet sponge and a drop of mild washing-up liquid, and pay extra attention to dirt marks that have appeared. Do not use any high-strength cleaners like bleach.
Soak: Fill your bathtub or large container with cold to tepid water and add an outdoor camping gear cleaner, submerge the tent so it is fully covered and give everything a good swill.
Re-rinse: Once the tent has been soaked, drain the bath and refill it with new water, rotating the tent in the bath to ensure all remaining muck or soap is removed.
Dry: nce you’ve wrung out any excess water, air out your tent. It’s best to pitch the tent to air it fully but your washing line or on an indoor airer can be used too. If you’re using a washing line reposition the fly and inner every hour or so to avoid mishaping. DO NOT use a dryer.
IF CLEANING OUTDOORS, YOU WILL NEED:
– Bucket
– Sponge
– Mild soap, free of strong detergents and added fragrance, or specific outdoor gear cleaner
– Spray bottle
– Hose
– Washing line/airer
STEPS FOR WASHING OUTDOORS:
- Repeat the Prep, Tidy and Spot Clean steps from the previous section, then:
- Hose down: Use your garden hose to wash the exterior of the tent, making sure no area is left dry. Use a garden hose or bucket of water to entirely rinse down the outside of the tent.
- Spray: Purchase a spray bottle of camping gear cleaner or use an empty spray bottle and create a mixture of cleaner (using the amount recommended by the manufacturer) and water and spray this all over your wet tent. Make sure to open up the interior and spray clean the inside of your tent too. Then wipe away the cleaning solution with a damp sponge.
- Repeat hose down: Reusing your garden hose, make sure to rinse off any remaining mud or cleaning residue.
- Dry: Once you’ve shaken out any excess water, air out your tent. It’s best to pitch the tent to air it fully but your washing line or on an indoor airer can be used too. If you’re using a washing line reposition the fly and inner every hour or so to avoid misshaping. DO NOT use a dryer.
HOW TO DEEP CLEAN YOUR TENT
If your tent has really taken a beating during your camping trip, it may be worthwhile giving your tent a deeper clean or undertaking a restoration. If your tent is in need of a little more TLC, then you may need to take the following steps:
HOW TO CLEAN A MOULDY TENT
It’s not uncommon to see mould and mildew appear on your tent. As a tent is a tightly closed space that often faces wet, warm and moist weather conditions, it can become a hotbed for the growth of mould and mildew.
To get rid of mould and mildew on a tent, you will need to give it a deeper clean. You can spray the affected area with a mould and mildew removal solution or, alternatively, it’s also safe to clean your tent and treat the affected area with a mixture of warm water and a few tablespoons of white vinegar in a spray bottle. Don’t be deterred by the smell of white vinegar as this is often used as a household cleaner and the scent fades quite quickly. However, if you’re planning on using the tent soon and can’t stomach the smell we’d recommend the alternative.
HOW TO REMOVE TREE SAP
When pitching up your tent, it’s best to not choose a spot that’s placed directly underneath a tree, as sap can easily latch onto your tent. If tree sap has made it’s way onto your camping gear, the best way to remove it is by using straight rubbing alcohol and keep wiping until the sap breaks down.
It’s worth noting that you will need to wait until all the residue has evaporated, then re-seal and re-waterproof the affected area.
HOW TO CLEAN ZIPPERS THAT NO LONGER RUN SMOOTH
Tent zippers play an important role in keeping you safe and dry from the elements, so it’s key you keep them in good condition. If your tent zippers are no longer running smooth, you will need to do a more meticulous clean in these areas.
Create a cleaning solution using a mixture of boiling water and white vinegar and use a toothbrush to brush the zipper’s teeth to remove any build-up of debris.
KEEPING YOUR TENT CLEAN AT CAMP
There are also things you can do at camp to keep your tent clean and this will ultimately prevent the need for deep cleaning once you return home. Some handy tips for keeping your tent clean while camping include:
- Keeping shoes at the door or outside the tent if you have a porch area
- When you pitch up make sure you place your tent away from any water or wet, muddy areas
- Keep a bag for any litter and reseal any leftover food. Our Trash Sack makes the perfect re-usable solution to add to your kit.
- Use compact storage to separate and organise your belongings
HOW TO STORE YOUR TENT TO PREVENT MOULD
Storing a tent damp can lead to hydrolysis. Essentially, this is when the PU coating breaks down and becomes sticky (the fabric may stick to itself as you unroll the tent). If you catch this early, you may be able to rescue the coating – beyond a certain point there is no way to fix it.
To help avoid this, it’s important to store your tent dry and loosely packed somewhere it can air, rather than tightly stuffed in a compression bag or airtight container, this will also prevent mould from appearing.

13x13ft Heavy Duty Inflatable Canopy Tent

13x13ft Custom Inflatable Canopy Tent

13x13ft Inflatable Tents for Parties & Events

13x13ft Inflatable Event Tent Custom

13x13ft Inflatable Tent Ultraportable
19. Are air tents waterproof?
Unlike traditional tents that require assembling the frame and attaching the canopy, inflatable shelters come pre-built with a polyurethane air-beam frame and a waterproof or water-resistant canopy already attached.
A key benefit inflatable tents introduce over traditional pole and canopy tents is having reliable waterproofness integrated directly into their fused fabric and seam design from the start rather than added as a separate coating step. Premium contemporary models implement cutting edge thermoplastic polyurethanes as the primary outer layer encasing the internal air beams and banning moisture through the solid welds.
This enveloped support structure construction allows the entire tent to resist water incursion proactively rather than rely solely on impregnated exterior sprays prone to deteriorating from wear. Rain, snow and humidity thus simply glide along the smooth yet breathable polymer walls as overpressure discourage infiltration through points of contact. While detachable rain flies boost concentrations during storms, the base chassis withstands precipitation threats intrinsically.
So whether facing early morning dew condensation, raging thunderheads rolling through or heavy snow dumped on the stable contours, trust all-in-one inflatable tents to deliver literal shelter from the storm! Their inherent waterproofing principles withstand the harshest wet conditions while traditional tents remain prone to seepage along the many junctures between components hosting happy campers within.
Inflatable architecture makes temporary habitats reliably water-resistant using modern integration methods protecting against leakage and even flooding immersion through and through.
These inflatable shelters have gained tremendous popularity in the market, and for good reason. Their ease of installation is their biggest advantage, making them a top choice among campers. Unlike traditional tents that require assembling the frame and attaching the canopy, inflatable shelters come pre-built with a polyurethane air-beam frame and a waterproof or water-resistant canopy already attached.
This innovative design eliminates the need for wrestling with metal poles and beams. Instead, you simply attach a pump to the valve, inflate the shelter, and watch it rise into a fully assembled structure. Most high-quality waterproof inflatable tents come with hand or foot pumps, and some even allow for electric or compressor-based inflation, as long as it is permitted by the instruction manual. Additionally, the package includes a set of pegs and ropes to secure the shelter to the ground and prevent it from being blown away by strong winds.
Waterproof inflatable shelters come in various shapes and sizes, catering to solo campers or even large festival gatherings where a stage and outdoor show can be hosted. The setup process is straightforward, as all the necessary parts are included, eliminating the frustration of discovering missing components that can hinder the assembly of traditional tents.
Concerns about the ability of inflatable shelters to withstand high winds are often raised by skeptics. They argue that metal and fiberglass frames do not flex under wind pressure. While this is true, they are prone to bending or breaking. In contrast, air-beams in inflatable shelters flex under pressure without snapping, ensuring your tent remains intact without the need for repairs.
It is important to handle your inflatable shelter with care to prevent damage to the air-beams. However, most shelters come with a repair kit that includes glue, patches, adhesive tape, and other tools to address minor tears. With these repair materials at hand, you can perform temporary repairs on-site and more permanent fixes when you return home from your trip.

16x16ft Inflatable Tent Custom Printed

Inflatable Canopy Custom For Brand Promotion 16×16

16x16ft Inflatable Hot Tent Optional Walls

Blow Up Party Tent With Full Color Print 16×16

Inflatable Event tent For Maximum Attention 16×16
20. Why are inflatable canopy tent so popular?
Between economic, environmental, health, and geo-political crises, our already too-serious world is slowly becoming even heavier and more stressful than it already was. This is the context for the return of inflatable canopy tents: a need to take a deep breathe (no pun intended), a longing for lightness, a desire to rise above and escape reality (a little). Inflatable tent give us back childlike mischief. They’re fun and innocent, and that feels good.
Inflatable tents and canopies have rapidly gained popularity due to the nostalgia and simplicity they evoke. The inflatable structure concept conjures memories of bouncing castle amusement and imaginative worlds inflated from thin air. They capture youthful joy and freedom in a protective bubble.
But beyond just playful associations, inflatables also represent straightforward functionality – shelter and space created instantly upon opening valves! No convoluted assembly steps with loose hardware and crisscrossing poles to construct a basic covered enclosure. The rapid setup conveys a satisfaction with modern convenience.
Moreover, the strange dichotomy of sturdy yet malleable polymer materials appeals aesthetically, having captivated architectural designers decades ago during the space age craze. The sleek inflated curvature hints at future possibilities as much as kid-friendly invitation. The tents prove roomy yet pack ultra-compact.
The planner of the incident also sees its custom flexibility and can be deformed quickly.
Whether seeking festive atmospheres or just quick temporary havens from rain, inflatable canopy tents transport us mentally as much as practically. They fulfill simplified mobility needs for outdoor functions with that added allure of the fantastic. It’s no wonder innovations in membrane tensile strengths and air control have made inflatables the popular choice over alternatives requiring more work yet delivering less wow!

Inflatable Air Canopies 16x16ft

16x16ft Full-color Outdoor Inflatable Tent

16x16ft Graphics Customizable Inflatable Tent

16×16 Inflatable Air Tent With Logo Print

16x16ft Air Inflatable Tents
21. Do you need ventilation in a inflatable tent?
Air inside the inflatable tent is almost always more humid than the surrounding air, so you want to replace the interior air with the drier outside air. Ventilation strategies include the following: If there’s a gentle breeze, pitch the tent so the door is facing into it.
A gentle pitter patter on your rainfly can be a soothing natural sound when you’re lying down at night in your tent. If those drips start originating inside your tent, though, it becomes a highly unpleasant resting place. And, under the right circumstances, the culprit—condensation—can infiltrate even the most well-engineered shelter.
So, how do you prevent condensation? The answer boils down to three strategies:
- Pick an optimum place to pitch your tent (answer: under trees)
- Minimize the sources of additional moisture inside your tent
- Ventilate, ventilate, ventilate
When warm air contacts a cold surface, condensation can happen. You see this effect in a mug of cold beer on a hot day. The same thing can happen in a tent: Warm air inside moves out to the rainfly, which is cooler because the outside air is cooler. The result is condensation on the underside of your rainfly. That water may then saturate your tent fabric or drip through a mesh window.
Strategy No. 1: Pitch on dry ground, preferably under trees.
Trees are your friend because air under trees tends to be warmer (as opposed to say, a wide open field), so your rainfly will be warmer, too. In addition, condensation happens on top of their foliage, instead of on your tent.
Strategy No. 2: Minimize the additional moisture sources inside your tent.
Moisture in a tent comes from three places:
- The existing moisture level in the air itself (humidity)
- Moisture added to your inner airspace by each breath you take at night
- Moisture added by any wet items you might have inside your tent
Once you’ve picked a place to pitch your tent, the humidity level of the air is set. And, though you’ll breathe out moisture throughout the night, not breathing isn’t an option. But you can control whether you stash or hang wet clothes inside a tent. If condensation control is the goal, then dry things out during the day (and never let a soggy doggy sleep inside your tent).
Strategy No. 3: Ventilate early, often and fully.
Air inside the tent is almost always more humid than the surrounding air, so you want to replace the interior air with the drier outside air. Ventilation strategies include the following:
- If there’s a gentle breeze, pitch the tent so the door is facing into it.
- Stake the tent out tautly and tension the fly in order to maximize the airspace between it and the wall of the tent.
- Open all rainfly doors and rollup sections; only deploy them if rain starts to fall.
- Open up all rainfly vents, especially opposing ones for cross ventilation.
- Open up all inner tent windows.
It’s rare for your rainfly to be dry come morning, but if you follow these tips, most of the moisture should stay on the outside—where it belongs.

16x16ft Commercial Inflatable Canopy Tent

16x16ft Inflatable Tent Use In Event

16x16ft Inflatable Tent For Beach Use

16x16ft Inflatable Tent For Event

16x16ft Inflatable Tent Custom
22. Can 1 person put up an air tent?
Easy, are a brilliant choice for solo campers and single parent family camping trips as ASAP CANOPY inflatable tents can be pitched by one person. This means that these are not self erecting tents, but you will need very little effort erecting an air tent.
One significant advantage inflatable camping tents provide over traditional structures is the ability for a single person to accomplish complete deployment rapidly. While technically still requiring manual unfurling and inflation activation, the integrated air beams and attached canopies lessen the intricate assembly steps demanding multiple hands.
By pre-linking the essential poles and roof coverings within the inflatable chassis itself, the sequence gets reduced to simply anchoring the base, pulling fabric taught, and engaging the pump. Strategic valve placements then streamline getting firmness and shape just right without struggling to join separate poles pieces blindly.
The self- contained nature thereby grants solo backpackers, single parents and couples added convenience traditional pole-dependent tents sacrificed. Quick yet sturdy temporary shelters manifest practically at the push of a button instead of chasing loose fasteners around! With practice, those on their own can master effortless inflation and control rarely plausible before modern inventions merged fabrics and frames.
So abandon notions that temporary dwellings demand groups for setup. Innovations like inflatable pole integration helps simplify secured camp deployment down to manageable size for even lone outdoor enthusiasts.

16x16ft Inflatable Event Tents

Custom Branded Inflatable Event Tent 16x16ft

16x16ft Inflated Canopy Tent Provides

16x16ft Inflatable Tent For Various Occasions

16x16ft Unique Inflatable Tents
23. Which is better an air tent or a pole tent?
Choosing between modern inflatable tent designs versus traditional pole-supported tents brings trade-offs in weighing convenience versus cost. Inflatable models require initial air pump setup investment but deliver quicker, simpler deployment and built-in tear resistance through their enclosed pneumatic beams. Pole tents remain cheaper upfront, yet demand manual labor manipulating multiple components.
Assuming correct inflation pressure is applied, air tents generally outlast pole predecessors structurally as well. Their continuously linked air chambers better distribute stresses dynamically rather than concentrate forces on isolated joints vulnerable to fatigue and cracking. But easy-assembly pole connectors, color-coded poles and instructions have narrowed complexity gaps for first-time users.
Other inflatable advantages include greater waterproofness integrating layered fabrics spanning entire enclosures, and lower packed weight without cumbersome rods. Their adjustable air pressure variability also adapts rooms for usage needs. However pole tents allow flexible shape configurations if willing to gamble stability experimentally.
For most purposes, inflatable tents now provide the turnkey functionality, speedy deployment and sturdiness modern campers demand without excess complexity. But those focused purely on initial purchase cost or extensively customizing layouts may still prefer traditional pole options – albeit with more hands-on effort incurred before enjoying ideally tensioned shelter whatever the choice.

16x16ft Custom Inflatable Tents

Lightweight Outdoor Inflatable Tent 16×16

16×16 Air Frame Tent Custom

Tent And table Inflatables:Custom 16x16ft Inflating Tent

16ft Custom Printed Inflatable Tent
24. Air Tents vs Pole Tents, Who is the Winner?
It’s the battle for the future of camping, air tents vs traditional pole tents, who will reign supreme!?
What’s all the fuss about?
For many a moon, a tent was only supported by a pole system. This kept the tent rigid and formed some peace of mind against natural elements of wind and adverse weather.
However, in last few years, a new kid has arrived on the block – the Air tent.
So how does an air tent work?
Ever seen those huge inflatable kites that surfers have been using the last few years? Well, those kites consist of an internal TPU bladder (which holds the air) and an external covering of fabric, which both shapes and stops the bladder from expansion, thus keeping its shape and pressure.
Sounds interesting, but how strong is it?
An air tent gets its structural integrity from the compressed air inside the tubes. If inflated properly, and with the right design, air tents far outperform traditional pole tents in strength and durability.
Set Up Time
These days, pole tents are quite easy to set up, so long as the poles are numbered properly and a detailed diagram of set up instructions provided.
Generally at least 2 people will be required to set up a pole tent / awning, it can be a bit frustrating at times and usually takes around 15 min for main tent and a further 20 min for awning. All in, expect to work on a set up time of + – 45 min.
Now when dealing with our air tent system, it’s a matter of pushing a button and letting the air do all the work.
The air awning and air bathroom are also sometimes all inter-connected, so all 3 structures will inflate at same time. Total set up time, under 10 minutes.
Poles snap, tubes bend. That’s the bottom line. Air beams have the ability to be incredibly strong and rigid which directly effects its performance in wind.
Air beams might move around a bit, but wont ever snap, like poles.
Another benefit of air beams is you get a much higher space inside the tent due to the structure inflating, where as with poles, you need a ladder or step to get the structure to a higher point.
Take Down
It’s Sunday morning, you had a few too many brandies around the fire, and now it’s time to pack up and go home. This is where simplicity is going to matter…
Traditional pole tents become the nemesis… unclicking each pole, loosening and shortening them, having canvas flapping all over you as the structure collapses – this is not what you want on the day of packdown!
With our air tents, simply open the release valve and the complete tent, awning and bathroom will collapse by itself into the trailer and wala! You’re done. Total set down time, under 5 minutes.
Repair and Maintenance.
We’ve all been there before, your extension pole gets stuck or bent and that’s the end of that.
Well, air beams work a bit differently, should you ever get a leak or puncture, they are incredibly easy to fix and you’ll be back up and camping within 15 minutes.
Simply remove the TPU tube, patch the leak or puncture with a provided repair kit, wait 5 minutes for it to set, and you are done!
Transportation
Family pole tents take up some serious real estate in travel mode.
Throw in an awning and you’ve got well over 20 poles to find a place to store – valuable space you could be using for say, packing more six packs!
Because the beams fold flat, you can simply deflate and store the tent full attached inside the main trailer space. This leaves all other storage open for other camping gear.
The Conclusion
With the invention of air beams, the pole tent as we know it will eventually be phased out for this much improved technology.
Air beams have so many advantages over traditional pole beams including being able to create a huge amount of internal space because of the inflation dynamic.
Air beams also have the ability to bend and reshape with wind, whereas poles will bend / snap / deform and become un-usable.
The air tents is the future of camping and we are proud to be the first company in USA to bring you this revolutionary technology!

16x16ft Inflatable Tent For Sale

16x16ft Inflatable Tents and Electric Pump Included

16x16ft Full-Color Finish Inflatable Tent

16x16ft Inflatable Tent Full Bleed

16x16ft Inflatable Pop Up Canopy Tent
25. Can you fix an inflatable tent?
Repairs can be done quickly by sticking a TUFF Tape patch directly onto a small hole. Larger holes and seams can be fixed neatly and with ease when using TUFF Tape and Stormsure Flexible Repair Adhesive together.
One advantage of inflatable tents is their easily repairable construction if accidental tears or seam splits ever occur in the rugged outer fabric layers. Minor punctures can be swiftly patched using simple peel-and-stick TPU tape patches applied firmly to the tear externally. The tapes fuse securely with a bit of pressure, providing airtight barriers again.
More extensive rips or de-laminating chamber joints require sealant applications beforehand to rejoin any frayed fabric edges or gaps completely. Flexible urethane repair adhesives work well for wicking into sliced chambers. Once fully cured per specifications, taped patches get affixed over the glued fix seals for durable abrasion protection.
This straightforward seal-glue-patch sequence enables even first-time DIYers to accomplish necessarySpot repairs without sending tents away for intensive professional rebuilding. The patches with adhesive cure times take more patience but leave inflatables structurally and visually intact. With basic fix accessories handy, owners can sustain treasured inflatable possessions rather than discard over accidental tears.
Let me know if you need any clarification or have additional questions on the inflatable tent repair process!

16x16ft Custom Canopy Tent Inflatable

16x16ft Heavy Duty Inflatable Canopy Tent

16x16ft Inflatable Canopy Tent Custom

16x16ft Inflatable Canopy Tents for Parties & Events

16x16ft Custom Inflatable Event Tent
26. Are inflatable tents hot?
However, even for some experienced campers, we remain unaware that tents are not fully waterproof! Feeling the material, we might think that tents can repel water completely, but contrary to popular belief, tents are only water-resistant.
What are air tents?
Air tents are a revolutionary alternative to traditional camping tents. Instead of poles, they use inflatable beams to support the structure. With a simple pump, you can quickly inflate and deflate the tent, making it incredibly easy to set up and take down. Not only are they convenient, but they also offer numerous benefits in hot weather.
Are air tents suitable for hot weather?
Absolutely! Air tents are an excellent choice for camping in hot weather. Thanks to their inflatable beams, they have a minimal number of seams compared to traditional tents. This means there are fewer areas where heat and sunlight can enter the tent, creating a cooler and more comfortable environment inside.
How do air tents stay cool?
Air tents are designed with several features to keep them cool in hot weather. Firstly, they often have multiple ventilation panels that allow for increased airflow. These panels can be opened or closed depending on the temperature and wind direction. Additionally, the rain fly of an air tent is made from reflective materials that help reflect heat away from the tent.
What other benefits do air tents offer in hot weather?
Air tents provide additional benefits beyond just staying cool. For example, the quick inflation and deflation process means you don’t need to spend as much time setting up the tent under the hot sun. The lightweight and compact nature of air tents also make them more portable and easier to carry to your desired campsite. Plus, most air tents come with ground sheets and bug screens, allowing you to keep insects out while still enjoying a breeze.
Can air tents withstand extreme heat?
Air tents are designed to be durable and withstand a wide range of weather conditions, including extreme heat. They are typically made from high-quality materials that are resistant to UV rays. However, it’s important to note that extreme temperatures, such as those found in desert climates, can still put any tent to the test. It’s always a good idea to take appropriate measures to stay safe and cool during your camping adventures.
Conclusion
Air tents offer a fantastic solution for camping in hot weather. With their easy setup, ability to stay cool, and additional benefits, they can enhance your camping experience while keeping you comfortable. So why not try an air tent for your next summer adventure? You’ll surely appreciate the convenience and relief from the heat they provide.

16x16ft Inflate Tent Ultraportable

16x16ft Custom Tents Branding

16x16ft Inflatable Tents For Sale

16x16ft Inflatable Air Tents for Fast & Easy

16x16ft Inflate Tent, Inflatable Pop Up Canopy Tents
27. Are tents 100% waterproof?
When the hot afternoon sun is high in the sky, the temperature inside the inflatable tent will be slightly lower than the outside. This is because the inflatable tent can isolate ultraviolet rays and can play a certain sunscreen. However, if you can’t ventilate, you will still feel hot. Therefore, if you want to use the inflatable tent in hot weather, you should choose a large area of shade to set up the tent. This can not only block out the sun, but also increase the air circulation inside the tent, reducing the temperature. In addition, you can also use fans or air conditioning equipment to cool the tent.

16x16ft Inflatable Spider Tent

16x16ft Inflatable Tent For Events

16x16ft Custom Printed Inflatable Canopy Tents

16x16ft Inflatable Structure Canopy Tent

16x16ft Branded Inflatable Canopy Tents
28. Can inflatable tents survive heavy rain?
You’ll need a tent with a fly, which covers any openings on the tent and keeps water away. Made of waterproof material, it’s important to have a fly that completely covers your tent’s windows and doors. Rain can easily find its way into your tent if not covered properly.
How to successfully camp in the rain
Is the forecast looking a little rainy for your upcoming camping trip?
Don’t let it bring you down! Some of the best memories happen on the rainiest days.
All you need are a few tips and tricks to ensure you’re prepared for inclement weather. Keep these tips in mind even if the forecast calls for sunny skies!
Stay dry in your tent
If you’re sleeping in a tent, there are a few things you can do to stay dry. You’ll need a tent with a fly, which covers any openings on the tent and keeps water away.
person putting tent up
Made of waterproof material, it’s important to have a fly that completely covers your tent’s windows and doors. Rain can easily find its way into your tent if not covered properly.
When setting up your tent, peg the fly’s guy lines away from the shelter. Ensure your fly is nice and taut so water can easily flow off.
Group sets up tent in the rain.
Weather is unpredictable, so remember to set up the fly even if rain isn’t in the forecast.
When looking for a spot to set up your tent, choose an area that is high and level. The last thing you want is to set your tent up in a potential puddle!
Inside the tent, keep all of your gear away from the sides. This will help keep everything dry.
Check the forecast, then check it again
Always check the weather conditions for your camping location and pack accordingly.
Keep an eye on the forecast for any sudden changes. Avoid camping during severe thunderstorms and don’t be afraid to reschedule your trip if needed.
Tarps, tarps, and more tarps!
Tarping your tent will help keep you dry in case of rain.
Plan to bring at least two tarps, one to cover your picnic table/eating area and the other to add extra protection above your tent.
tarp
Tie your tarp as tight as possible to avoid flapping in the wind and always set up a sloped roof to allow water to run off.
A tarp over your picnic table will allow you to easily cook and enjoy a meal in a dry space. It’s also the perfect spot to hunker down and stay dry.
Get your campsite rain-ready
Now that you have your tent and tarp all set up, there are few more things to keep in mind throughout your camping trip.
equipment in trunk
There are a few ways to keep your equipment dry and durable during your stay. Keep all of your personal items in a waterproof bag or in your vehicle. Store wet items in bags or bins to keep them from getting the rest of your gear soaked.
Make sure you cover your firewood and kindling with a tarp when the rain starts.
When getting ready to head home, dry your tent and other equipment before packing up to prevent mold. If you have to pack up in the rain, leave your gear out to air dry when you get home.
Bring a rainy day backpack
The best way to get through a rainy day while camping is to avoid being bored. Brainstorm with your family and friends about good rainy day activities, and come prepared!

playing cards in tent
Some of our favourite rainy day activities are:
board games
a deck of cards
arts and crafts
books
puzzles
Other rainy day essentials
Make some room, we have a few more essentials to bring along!
A raincoat or poncho is a must to keep you dry. The temperature can feel chillier when it’s raining, so pack an extra layer to go underneath as well.
Bring along waterproof shoes or rubber boots, and lots of extra clothing, especially socks. You’ll be surprised how many clothing items you can go through during a rainy weekend!
people hiking
Pack a toque and few extra blankets for those cool, damp rain days and add some extra beach towels to dry off when you venture out into the rain.
Rainy days can get surprisingly dark. Ensure you have lots of light sources, like flashlights, lanterns, and headlamps.
Don’t forget some extra batteries!
Hiking in the rain
Don’t let a little rain stop you from a day of hiking!
person hiking on wet boardwalk
Hiking in the rain can still be enjoyable as long as you’re prepared. Make sure you have the appropriate gear, including waterproof hiking boots and a rain jacket.
Avoid hiking if there are weather warnings like strong winds, floods, or thunder and lighting. Stay on the trail and be mindful of slippery trail conditions.
Don’t forget that positive attitude!
Camping is the perfect opportunity to appreciate what nature has to offer, rain or shine! Don’t let the rain stop you from having a good time.

20x20ft Commercial Inflatable Canopy Tents

20x20ft Inflatable Tents Use In Event

20x20ft Inflatable Tents For Beach Use

20x20ft Inflatable Tents For Event

20x20ft Inflatable Tents Custom
29. Can I use an electric pump on an air tent?
Asap Canopy Inflatable Tent Kit contains an electric pump, so we can easily use the electric pump to inflatable the inflatable tent.
Air tent pumps are known for saving time and energy, essential for ensuring your inflatable tent maintains a stable structure. With proper inflation, your tent will withstand the elements and remain sturdy throughout your trip, no matter what.
At ASAP CANOPY, we pride ourselves on being able to deliver the best outdoor equipment on the market – and our air tent pump range is no exception. Our selection is stocked with standard and electric pump options, designed to provide you with exactly what you need to effortlessly and quickly inflate your tent, no matter the size or model.
If you’re looking for an air tent electric pump to inflate a larger tent model, look no further. Gone are the days of manually pumping up your family-sized tent, only to be left feeling exhausted before your adventure even begins!
With the help of our top-quality electric air tent pumps, you’ll be able to effortlessly inflate your tent in a matter of minutes, leaving you with more time to enjoy the great outdoors.
Plus, when you shop with us, you’re guaranteed to find the best quality products on the market, as we only offer equipment from the best and most trusted brands in the game.
So, whether you’re looking for the perfect range of electric air pump for tents or a manual option to inflate a smaller tent, you’ll find what you need ahead of your next outdoor adventure with us.

13x13ft Inflatable Event Canopy Custom
13x13ft Inflatable Tent With Optional Walls
13×13 Inflatable Tent With Full Color Printed
13x13ft Fast Setup Inflatable Canopy Tent
Inflatable Tents For Events With Full Color Print 13×13
30. Are yurts better than inflatable tents?
Since they use a wooden frame, yurts are much sturdier than bell tents and can hold up well against heavy winds. Because of their wooden frames, however, they are heavy and could require hours to set up.
YURTS VS INFLATABLE TENTS: WHAT’S THE DIFFERENCE?
When it comes to enjoying the great outdoors in luxury, there are few better ways to experience it than inflatable tent and yurts. People often confuse the two of these excellent shelters, thinking they are the same thing, but they have some notable differences that set them apart from one another. If you want to be able to go on relaxing glamping getaways whenever you’d like, you are going to want to go with one of these options, but it is just a matter of preference and taste which one is better for you. This can be your guide to not only help you see how these two differ from one another and the pros and cons of each, but also to help you figure out which one is best suited for your needs. Since inflatable tent a lot of similarities to both canopy tents and yurts, some clarification on those is included as well.
Yurts have been around for thousands of years, and they originated in Asia. The walls are a wooden structure designed to offer support for the poles that make up the roof. Their ancient use in Central Asia required that they be relatively easy to set up, take down, and transport. Since they use a wooden frame, yurts are much sturdier than bell tents and can hold up well against heavy winds. Because of their wooden frames, however, they are heavy and could require hours to set up. If you don’t mind taking a while to set up your shelter, knowing that the comfort you get from it will be well worth the time and effort, this might be the shelter for you!

One advantage of a yurt is its size. If you have a big group that you plan on going camping with, this may be the most comfortable and sensible option (and you will also have more people to help you get it set up). If you just enjoy having extra room to spread out and relax, it can be great for that as well. Yurts are also excellent for holding events such as receptions, as many can be connected and you can make the area as big as you need. As far as glamping goes, if you want to feel like you are in a cozy house in the wilderness, you won’t find anything better than a yurt.
The idea for a inflatable tent originated from the design of a canopy tent, though instead of having several poles crossing in the center to make the structure, the roof is held up by just a single center pole. This makes it much easier to set up and take down than a yurt. This was what inspired the bell tent in the first place, as it was originally used for war and therefore required convenience and quickness. If you don’t want to spend a lot of time setting up your campsite and want to dive right into a luxurious glamping getaway, a bell tent would be the ideal choice.
inflatable tent are much more versatile than yurts, and they don’t need as flat of ground to be set up on as yurts, making it much easier to find a good spot to set up camp. If you are using it for an event, this is a great option for those who don’t have a lot of space, and it still looks elegant enough to use for a reception.
While the origins of the yurt can be traced back to Central Asia, the tent was popularly used by Native Americans. While the inflatable tent design is based on that of a tent, don’t confuse the two, as they are quite different from one another. The inflatable tent utilizes a center pole to give it its structure, while a tent is a simple cone shape created by poles crossing in the middle. What differentiates it from a yurt (besides its quicker setup) is that it does not have walls or a roof. Transportation is quite simple as well, which was what made the design so appealing a long time ago.
Tent can be around the same size as inflatable tent, though with such a variety of options, they can be smaller or much larger. Tent, like yurts, can be great event shelters, since you can connect several, making the reception area as large or small as you need.
Since yurts, bell tents, and tipis all have their own advantages and disadvantages when it comes to camping or event-hosting, the “best” one can only be decided by you and your individual needs. Make a pros and cons list of each, and you should hopefully be able to figure out which one suits you. At least now you know what makes each one unique!
Just as important as knowing the difference between each of these shelters is knowing which the best ones are to purchase. Here are some of the best inflatable tent market right now:
One of the best tent options on ASAP CANOPY Tents’ website is their inflatable tent, which is one of the best bell tents that you can buy that is both high in quality and low in price.
13x13ft Inflatable Event Canopy Custom
13x13ft Inflatable Tent With Optional Walls
13×13 Inflatable Tent With Full Color Printed
13x13ft Fast Setup Inflatable Canopy Tent
Inflatable Tents For Events With Full Color Print 13×13
31. Why does my air tent keep collapsing?
It could be something as simple as not enough air in the beams or a twist in the tube, which could create a kink and make the beams susceptible to collapsing.
Please deflate the beam and remove from the tent, re-inflate and pressure to 1 PSI above the recommended limit of your tent (remove the black pressure valve if required). When inflated out of the tent, check for twists in the inner tube, a bend in the beam indicates some kind of issue with the tube.
If there is an issue with the tube then opening the sleeve and ensure the tube is flat inside the sleeve and is inserted all the way to the sleeve end and folded back if necessary.
Re- inflate the tube / beam, and make sure the end guylines are pulling the end beams apart. (i.e. away from the centre of the tent).
If this does not solve your issue, then please either submit a ticket or visit our spares website to purchase spare beams.
13x13ft Inflatable Event Canopy Custom
13x13ft Inflatable Tent With Optional Walls
13×13 Inflatable Tent With Full Color Printed
13x13ft Fast Setup Inflatable Canopy Tent
Inflatable Tents For Events With Full Color Print 13×13
32. How do I find a leak in my air tent?
SMART AIR TUBE REPAIR
Got an inflatable tent? It is unlikely you’ll damage or puncture an air tube – they are really tough and should provide years of carefree camping.
But our inflatable tents is often asked what to do in an emergency so he took to his workshop to look at ways to quickly repair an air tube with minimal disruption to a holiday.
It is important to note
1. The protective sleeve should never be opened or removed unless you are positive that the air tube is leaking and needs repair.
2. The air tube is oversized, allowing enough material to be carefully tucked back on itself at each end in order to protect the end welds.
3. That these instructions are not relevant in the rare event of a catastrophic failure of an airtube (bursting).
4. These are temporary repairs only and your local Outwell retailer should be contacted in order to organise a replacement tube.
TEST 1
I removed an air tube from its protective sleeve and tried to damage it. The tube proved so tough that it took a knife to puncture and slit the material.
I repaired five punctures and four slits using:
a. Tear Aid Type A (Also marketed by Storm)
b. Stormsure Tuff Tape
c. Tenacious Tape
d. Gorilla Tape
e. Ultimate Duck tape
f. Homebase Power Cloth Tape
 a) to d) are from my field repair kit, e) to f) were obtained from a DIY store. All tapes chosen should provide instant repairs.
After each repair I re-inflated the air tube and left for an hour before retesting pressure. The materials that showed minimal air loss were then left overnight before I tested the pressure again. Tapes d) to f) showed varying degrees of unacceptable air loss and, due to inflexibility, distorted the air tube (image left) so were discarded – although, like c), d) may have certain value in an emergency. Tear Aid, Storm and Stormsure tapes provided perfect repairs and feature in my tent repair kit.
I also tried to damage the connecting tube. This proved impossible to split so after 15 minutes working it back and forward (image left) I resorted to shears. I then successfully mended the split using Tear Aid Type A covered by self amalgamating tape (also known as self-bonding tape) to strengthen the repair when under pressure.
TEST 2
I repeated the test on a longer 17cm slit crossed by a 3cm slit and immediately placed under pressure.
As to be expected, without the protection of the sleeve the split became wider (first image below) and developed a bulge when the Tear Aid stretched as the air pressure was slowly brought up to and approached 0.5 bar — yet it maintained an air tight seal.
The pressure was taken off and the air tube was returned to its protective sleeve to reinforce the repair. The air tube was then slowly brought up to 0.6 bar without any noticeable problems (second image below).

NOTE: The sleeve is a key structural element and so an air tube should never be inflated unless enclosed by the sleeve. And the sleeve should never be unzipped if the tube is inflated.
NOTE: It took a little force to push the repaired connecting tube through the sleeve grommet and this should be kept in mind when making a repair.
TEST 3
So, here is how I repaired an air tube in my workshop.
It will be a little different out in the field for you should be able to repair damage without removing the tube from its protective sleeve – a little like repairing a bicycle inner tube… (see Finding a leak below)
My test rig comprises a main tube to provide operational pressure and an undamaged spare air tube. I tested these before I started to ensure everything was operational (first image).
I then cut an approximate 2.5cm V-shape slit in the air tube (third image) and cut the connecting tube almost half way through (second image).

REPAIR Air Tube
1. Clean the area with an alcohol swab to remove grease and allow to dry.
2. Cut out a patch allowing around a minimum of 2.5cm each side of the tear. Here I use Tear Aid – Type A (also available from Storm), although I have also used this technique for Tenacious Tape and Stormsure Tuff Tape.
3. Stick one edge of the tape to the air tube and gently stick down taking care to minimise air bubbles. Press down firmly.

REPAIR Valve
4. Clean the connecting tube with an alcohol swab to remove grease and allow to dry. Wrap the damage in a strip of Tear Aid Type A.
5. Wrap the repair with self-amalgamating tape to provide rigidity and prevent the repair tape from distorting under pressure at this high stress point. The self-amalgamating tape should be stretched two to three times its length as it is applied and it will then bond with itself to provide a tough glue-free sheaf. This is critical to the success of the repair.
6. The repaired air tube then went on the test rig and slowly inflated by cracking the isolation ball valve to check it was air tight. Remember that in normal circumstances the air tube must be in its protective sleeve before inflation and that the inflation without the sleeve here is for test purposes only. For more info on valve maintenance click here.

Five Rules for ‘In Field’ Repairs
• Do not inflate an air tube, repaired or otherwise, until it is in situ and protected by its sleeve – and never undo the protective sleeve when an air tube is inflated.
• Once the repaired air tube is in its sleeve slowly inflate to the lower end of the operating pressure range by cracking open the isolating ball valve.
• Regularly check air pressure to ensure minimal stress to the repair.
• The use of self-amalgamating tape is critical on repairs to the connecting tube due to the pressure and stress experienced at this point.
• Remember this is a temporary repair. Contact your supplying retailer as soon as possible to arrange a replacement tube.
VALVE MAINTENANCE
We guide you to how to take good care of the valves in your air beds and air tents.
Finding a Leak
Have you repaired a bicycle puncture? Then you can repair an air tube – it is very similar!
1. If an air tube appears to have lost its pressure first consider:
• Ambient temperature – if it is cold then the air pressure will diminish and an air tube will appear deflated.
ACTION: Leave – the pressure will increase as the day warms.
• Air loss from the inlet valve – sometimes dirt stops the inlet valve closing properly, leading to air loss.
ACTION: Check for air escaping and, if so, strip down and clean.
2.Try to locate the damage. Pump in more air, close inside valves if present, and look for visible damage. Try to hear air escaping or feel it against your cheek. For small punctures it might be helpful to apply a little water on the spot you suspect as small bubbles will show up.
ACTION: Mark the damaged spot.
3. Completely deflate the damaged air tube. Then open the sleeve zip until you reach the location of the leak.
ACTION: Repair as above.
Proactive Prevention
1. Regularly check the air pressure. Standard operating pressure lies within 0.3 – 0.5 bar. However, warmer conditions, like those Continental temperatures experienced in summer, may require a lower pressure around 0.4 bar. ACTION: Pressure will change throughout the day and you may find you need to add air at night to compensate for falling temperatures and let air out in the morning to prevent over expansion as the pressure increases with the heat of the day.
2. If the protective sleeve swells or bulges DO NOT open the zip to check.
ACTION: Immediately reduce the air pressure.
3. In the unlikely event that the seams or zip on a protective sleeve fail then deflate the tube immediately and temporarily repair the damage using a strip of Gorilla or heavy duty Duct/Duck tape that has minimum stretch to provide tube support under pressure. Re-inflate the tube to a lower pressure to prevent stress on the repair.
4. Do not open the sleeve unless for repair – this will minimise the chance entry of abrasive/sharp contaminants.
13x13ft Inflatable Event Canopy Custom
13x13ft Inflatable Tent With Optional Walls
13×13 Inflatable Tent With Full Color Printed
13x13ft Fast Setup Inflatable Canopy Tent
Inflatable Tents For Events With Full Color Print 13×13
There are more common problems
33. Should I air out my tent after camping?
Ensure your tent is absolutely dry before storing it. Even hot, dry adventures can produce subtle moisture or condensation inside the tent. Dry your tent out after every trip.
34. Are tents safe in wind?
Most tents are designed to withstand a certain amount of wind, however speeds over 30 mph can cause damage. Remember to take rain ponchos and lots of plastic bags. Pack your clothing and bedding in plastic bags before packing into rucksacks.
35. How much wind can a air tent take?
Depending on the collection, we ensure all our correctly-pitched family tents are rated to withstand between Force 8 to Force 10 winds on the Beaufort Scale – with Force 10 being the gale storm rating considered enough to uproot a tree!
36. Are dark tents hotter?
While anything darker than white — be it a pink or a light blue — is going to be slightly warmer, any light-colored profile will be significantly cooler than a blackout canopy. Bright-colored tents are always cooler than dark-colored tents.
37. How long is a tent good for?
Most tents are good for a few days, but if you plan to leave one up for more than a week, consider a more permanent solution, like a canopy or a long-term structure. In my experience, I left a tent up for a month, and it showed some wear and tear, especially after rainstorms.
38. How often should I're waterproof my tent?
39. How do you ventilate a tent at night?
40. Do tents leak when raining?
41. Why do tents get wet inside?
42. How long do tents stay waterproof?
43. How long do inflatables tent?
44. Can you leave inflatables on all night?
45. Why use a tent with no floor?
46. Can you sleep without a tent?
47. How do I stop moisture in my tent?
Did you know a single camper produces nearly one pint of condensation inside a tent? Spare your cabin camping tents from condensation, along with mold, mildew, and, well… just a damp and uncomfortable camping experience.
Use these condensation prevention tips and manage condensation in your camping tent.
How Tent Condensation is Created
Condensation occurs when warm air contacts cold surfaces, causing water vapor to turn into small droplets of water. So when the night turns chilly outside, as the family is all snug and warm inside a tent, condensation can and will occur. A tent’s rainfly keeps out the pitter-patter of rain, but condensation from inside can still gather on the underside, dripping through the mesh materials.
And although thicker canvas tents provide that much of an extra layer, from time to time, condensation will happen if you are not careful. Rainier conditions and colder nights are notorious for creating condensation, even in the hardiest of tents.
So let’s take a look at what you can do to manage condensation inside a tent and keep you dry.
8 Ways to Prevent Condensation in Your Tent
stove and kettle outside camping tent
Preventing condensation buildup inside a tent really comes down to managing its air circulation. Here are some tips and tricks to remember to keep those raindrops away and maintain your tent.
1. Set Up on a Dry Site With Protective Trees
Trees are wonderful at providing shade, but they also ensure a blanket of warm air beneath the branches. While this might seem contradictory in preventing condensation in your tent, it ensures the top of your tent (or rainfly) is warmer too, which means the condensation transfers to the branches and not the tent.
2. Stake Out Your Tent Properly
It might go without saying, but always ensure your camping tent is staked out taut and secure. Creating a tight tension to the materials, whether that’s nylon or canvas, gives your interior that much more room to breathe and invites airflow.
3. Hang Wet Items Outside
Leave wet or moist items outside. That goes for anything from damp clothes like rainjackets and shoes to the beach towels you used to dry off with earlier that day. Your breath creates enough condensation inside a tent as it is. No need to add to the moisture. Instead, hang up your items on a clothesline outside and change into dry clothes.
4. Use a Dehumidifier
If you have a more permanent canvas tent, a dehumidifier works wonders to prevent condensation. Simply set it up in a corner and let it do the rest, gathering moisture before it has a chance to build up.
5. Avoid Cooking Inside
As a whole, avoid cooking inside your tent. If you’ve added a tent stove to keep warm, that’s fantastic! But limit your cooking to an outdoor kitchen space if you can.
Also, keep in mind that the warmer a tent, the more moisture and evaporation will contribute to condensation.
6. Add a Rainfly
Adding a rainfly to tents, especially canvas tents, can provide an extra layer between the warm tent and the cooler outdoor air. Rainflys and tent shades not only create an extra barrier to keep your tent’s top clean, but they also help to create an insulative layer, reducing the temperature inside during hot summer days.
And no, a rainfly isn’t just for backpacking tents – you can find bell tent roof covers too!
7. Choose a Tent With Good Ventilation
breathable features on a canvas bell tent
Good ventilation goes a long way in preventing condensation in a camping tent. Large doors (and even double doors) that have zippable mesh panels give your tent a breezeway to allow air to bring down the warm temps inside. Position the main doorway toward the wind to provide optimal circulation.
Besides entrances and doors, some tents also offer other types of built-in ventilation. For example, our canvas tents have dual mesh and canvas wall windows that can be rolled down for extra airflow. In fact, we recommend keeping the windows cracked a little at all times, even while raining, to help the interior breathe.
Plus, each of our our bell tents feature several ceiling ventilation points at the peak.
8. Pick a Tall Tent
Speaking of our canvas bell tent’s peak, when it comes to tent condensation – the height matters! The closer the roof of your tent is to your breath, the quicker condensation will build. Instead, choose a tent with a bit more breathing room, space and a higher pitch. It will make your camping experience more comfortable all around!
Weatherproof and Condensation Preventing Features
Even if your tent is mold and mildew resistant, like our beautiful canvas tents, it’s plain good practice to keep the moisture to a minimum.
ASAP CANOPY Tents canvas tents are built rugged with weatherproof features and quality stitching designed to prevent leaks. So if you think your tent has a leak, more than likely, it’s condensation.
48. Why are air tents so expensive?
49. What are the disadvantages of inflatable tents?
The Cons of Inflatable Tents
One potential downside is the risk of punctures or leaks. Although modern inflatable tents are made with durable materials, accidents can happen, and a puncture could deflate the entire structure. However, most inflatable tents come with repair kits to address such issues quickly.
50. Do air tents deflate?
All inflatable tents come with air valves, some bigger than others. Open these air valves up and wait for your tent to deflate.
51. Are inflatable tents good for winter?
The main thing is to choose a model made of waterproof materials. Therefore, inflatable tents will protect you from heavy rain, snow, and wind, whether it’s summer, spring, or winter outside.
52. How safe are inflatable tents?
Are inflatable tents strong and reliable? Inflatable tents might be filled with air, but they’re just as sturdy and reliable as standard tents. They can withstand strong winds and come with the usual guy ropes and pegs to keep them safely secured to the ground.
53. Do inflatable tents get punctures?
While traditional tent poles are prone to breaking, air tubes aren’t exempt from going faulty, either. Although air tubes should last for years to come thanks to their tough construction, damage or punctures can happen. That’s why you need to have spares on hand, just in case something goes wrong.
54. Are bubble tents safe?
A lot of these plastic bubbles are possibly more porous than a wall, so maybe more air can circulate, but they are not going to be as safe as a really open-air set up where a breeze can flow and there’s lots of air exchange.
55. Are air tents waterproof?
Unlike traditional tents that require assembling the frame and attaching the canopy, inflatable shelters come pre-built with a polyurethane air-beam frame and a waterproof or water-resistant canopy already attached.
56. Are air tents stable?
Quick and Easy Setup: Air tents can be pitched and taken down faster than pole tents, thanks to the inflatable beams. Robust and Stable: They offer excellent stability and resistance to weather conditions, as they lack traditional poles.
57. Do tents lose waterproofing over time?
Many tents come with seams that are sealed, but the sealant can wear out over time, letting water leak through. If you find a leaky seam, here’s what you’ll need: A rag. Rubbing alcohol.
58. What is the most popular type of tent?
What Are the Different Types of Tents?
ASAP CANOPY runs through all the different types of tents to help you find the right tent for you and your group.
On a camping trip, your tent is your shelter! And even on a picnic or BBQ, at a festival, or spending a day at the beach, a tent is a great item to have to provide a home base and protection from the elements. Tents come in all different shapes and sizes, from bivy sacks and bivy tents weighing only a couple of ounces to massive cabin tents ideal for larger groups weighing 50lbs or more. Initially, tents were made out of thick canvas, but these days, they can be created from many types of materials, contributing to their weight and durability and making some tents better than others for bad weather or high winds. Many modern tents boast tons of features, including large vestibules, electric hook ups, gear lofts and pockets, room dividers, and vertical walls to increase headspace. With so many different types of tents, there is a perfect tent for any application!

1. Dome Tent
The dome tent is the most common design today. It has two flexible tent poles that cross in the center and are anchored to the corners of the tent with stakes, creating a dome shape that makes this tent easily distinguishable from other types. Dome tents come in a range of different sizes, with capacity ranging from a single person up to about eight people, making it an option for both backpacking and car camping, and for a solo camper or a family camping.
In double-wall tent designs, there is a breathable inner tent, usually made of no-see-um mesh to provide ventilation (and protection from mosquitos and other bugs!), and a waterproof floor. The second wall comes in the form of a rainfly resting on top of the poles. Sometimes a footprint is included with the tent as well, which is an extra layer of fabric underneath the tent. Single-wall tents have an interior that is waterproof throughout, which does sacrifice some breathability, and oftentimes, condensation can form.
Pro Tip: If it’s not raining, use trekking poles and your rain fly or a tarp to create an awning over your tent door—this will provide sun protection and a shaded area to hang out!
Dome tents are lighter than other tent options, can have a lot of headroom depending on the floor area you go for, and are easy to pitch. Vestibules (the area around the tent doors that’s sheltered by the tent’s rain fly) are often included and provide plenty of gear storage space, but not all dome tents include them. A downside of dome tents is that they tend to catch in the wind and be flattened or blown away.

2. A-Frame Tent
Formerly very popular with campers due to its simple design, the A-frame tent (also known as the Ridge tent) looks like a capital A, as its name suggests. Originally made of canvas with metal or wooden poles, modern options of this tent are composed of lightweight fabric such as nylon and polyester and have aluminum poles. This tent is easy to set up and surprisingly stable, but it is heavy, bulky when packed, and lacks headroom.

3. Multi-Room Tent
The best option for large families with kids, the multi-room tent is closer to a house than a traditional tent. The primary advantage of this type of tent is privacy, created by room dividers. The multiple rooms also offer gear storage. These tents are typically large and have the interior space needed to provide enough room for a large family or group. The main drawback of this style of tent is its weight and size, and pitching takes more practice and time. Windy conditions will also be a major issue for large, multi-room tents. Although they have some drawbacks, multi-room tents are the preferred choice for large family gatherings, as they will provide comfort and plenty of space – you could even fit multiple cots or air mattresses (in some tents even a king-size mattress) inside!
Pro Tip: If you are camping with a big group with multiple large tents, look for a campground that offers a few “group spots”, and make a reservation! These spots have multiple tent sites and provide extra space so that even a big party can spread out.

4. Backpacking Tent
If a multi-day hike or a long-distance trek to your campsite from the car is to be expected, a lightweight tent or an ultralight tent is the best choice. Generally, backpacking tents are smaller than other options and may have a significantly lighter packaged weight and an extremely light minimum trail weight, since hikers may be carrying them for many miles into the backcountry in or attached to their backpack. Their design tends to value small size and their material quality tends to directly impact the price point. Since backpacking tents typically have fewer poles, a small packed size, a lower peak height, and limited square footage, they are usually one-person or two-person tents, but three-person and four-person backpacking tents do exist.

5. Geodesic and Semi-Geodesic Tents
These tents have all the advantages of a dome tent with increased support, durability, and stability. The poles of these tents cross many times, intersecting to form triangles along the tent top, giving it a lot of stability. They are better than dome tents at holding up in heavy rain or storms but are larger to pack and more challenging to pitch.

6. Pop-Up Tent
Relatively newer and also known as “instant” tents, pop-up tents are spring-loaded and pop into shape in just a few seconds. These tents are not meant for extreme weather conditions; there are better options for camping in inclement weather. Ease of use is the key perk with pop-up tents.

7. Tunnel Tent
Similar to a dome tent, but longer and more cylindrical, these tents tend to use guy ropes (ropes that go from attachment points on the outside of the tent to the ground for added stability) to pitch, meaning they are typically non-freestanding tents. They offer a great space-to-weight ratio and identical pole length, so you don’t need to worry about mixing up poles. The biggest issue is they must be pitched properly or else they may sag in the middle.

8.
Another newer design, these tents come with inflatable poles. This makes for an easy one-person setup, but the inflatable tent is heavier than other models and requires an air pump.

9. Teepee Tent
The teepee (or tipi) is the original, often cotton, canvas tent. Also referred to as a bell tent, this type of tent tends to have a high peak height, is easy to pitch, and only needs a single central pole. Traditionally, teepee tents were heavy and bulky, although the modern models can be lightweight and are similar to a minimalist, tarp-style set-up. These tents have a high pitching point (the point where the pole meets the tent, creating the peak of the tent), which allows for plenty of headspace when inside the tent, but may pose a challenge when setting up. Flooring is often not included.

Find the Right Tent for You!
As you can see, there are many types of tents, and this list is not all-inclusive! Pyramid tents, canopy tents, hammock tents, car-top tents, and truck bed tents are other tent types, and the list goes on! When planning a tent camping trip or outdoor adventure, there are many options to take into consideration, which can be overwhelming! If you still have questions about which tent is right for you for your next camping trip or outdoor adventure, reach out to me.
59. Are inflatable tents good in wind?
Poled tents could well collapse then stay collapsed! Air tents are not immune from high winds. They still have to get taken down when the going gets too tough. The trick is deciding when that point is reached.
60. Do inflatable tents puncture?
The same goes for your inflatable tent. While traditional tent poles are prone to breaking, air tubes aren’t exempt from going faulty, either. Although air tubes should last for years to come thanks to their tough construction, damage or punctures can happen.

 5×5 Pop Up Tent
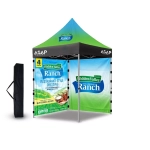 6.5×6.5 Pop Up Tent
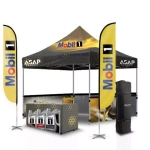 10×10 Canopy Tent
 10×15 Canopy Tent
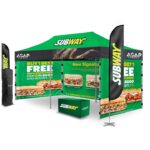 10×20 Canopy Tent
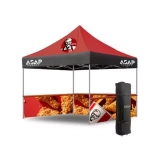 Canopy Options
 Blank Canopy Top
 Canopy Top
 Canopy Walls
 Canopy Side Skirt
 Blank Canopy
 Blank Canopy Kit
 Inflatable Canopy Tents 10×10
 Inflatable Canopy Tents 13×13
 Inflatable Canopy Tents 16×16
 Inflatable Canopy Tents 20×20
 Inflatable Canopy Tents 23×23
 Inflatable Canopy Tents 26×26
 Inflatable Spider Tents
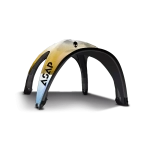 Inflatable Dome Tents
 Inflatable Eclipse Tents
 Inflatable Party Tent
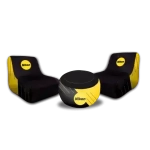 Inflatable Furniture
 Inflatable Pillar
 Single Pole Star Tents
 Double Pole Star Tents
 15FT Inflatable Arches
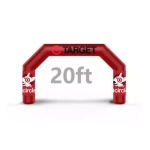 20FT Inflatable Arches
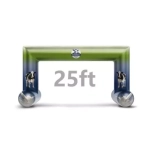 25FT Inflatable Arches
 30FT Inflatable Arches
 40FT Inflatable Arches
 50FT Inflatable Arches
 Custom Constant Arches
 Custom Sealed Arches
 Fitted Table Covers
 Stretch-Fit Table Covers
 Loose Table Throws
 Cross-Over Stretch-Fit Table Cover
 Round Stretch-Fit Table Cover
 Blank Table Throws
 3-Sided Loose Table Throw
 Round Fitted Table Covers
 Table Runners
 Square Table Covers
 Feather Flags
 Blade Flags
 Feather Banner
 Blade Banner
 Teardrop Flags
 Teardrop Banner
 Rectangle Flags
 Rectangle Banner
 Mesh Event Banners
 Pop Out Banner Horizontal
 Pop-Out Banner Vertical
 Trade Show Display
 Trade Show Display Kit
 Pop Up Trade Show Display
 Pop Up Trade Show Display Deluxe Kit
 Pop Up Trade Show Display Kit
 TableTop Displays Kit
 Pop Up Tabletop Display Kit
 Pop Up Tabletop Display
 Tabletop Display
 Straight Trade Show Exhibit Booth
 Banner Stand
 Tent Accessories
 Flag Accessories
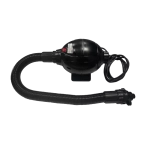 Arch Accessories
 Trade Show Accessories
